You know those little triangles that you put on the corner of a square? Well I have no idea what they are called, but they are used to make a snowball block, among others. If you know what the real name for them is please let me know, but I am calling them corner triangles.
Here's how I learned to do them from Gail at The Berry Patch in Fort Worth. We used this technique to make the star points at the quilt in a day class. Here's a pic of my finished quilt top from that class.

As you know I will do anything to not have to draw a line on a piece of fabric or to cut on the bias before sewing. So this technique was right up my alley.
1. You will need a straight line on your sewing machine table. To do this lower your needle and raise your presser foot. Place a ruler under the presser foot against the needle and lower the presser foot. Align the ruler up with a line on your machine that is perpendicular to the ruler to make sure the line is straight. Then put a ¼” piece of tape right up against the ruler. You will use this line as a guide to make the corner triangles.

2. To make the corner triangles place a 2 ½” print square on the top right corner of a white 4½” square, right sides together. Note - the larger square can be just about any size you want.

3. Line up the point where the top left part of the print square meets the white and start sewing there. You will use the tape as a guide for the bottom right corner of the print square. Sew with the bottom right corner of the print square following the tape.


4. Doing this will give you a perfect diagonal everytime without having to draw a line on the back of the print square or guessing where the diagonal meets.
5. Trim the print square above the white point only. This keeps your square straight if the triangle gets wonky when you press it. This is the most important step in my opinion, theres no guessing where the real sewing line is if you still have the whole white square.
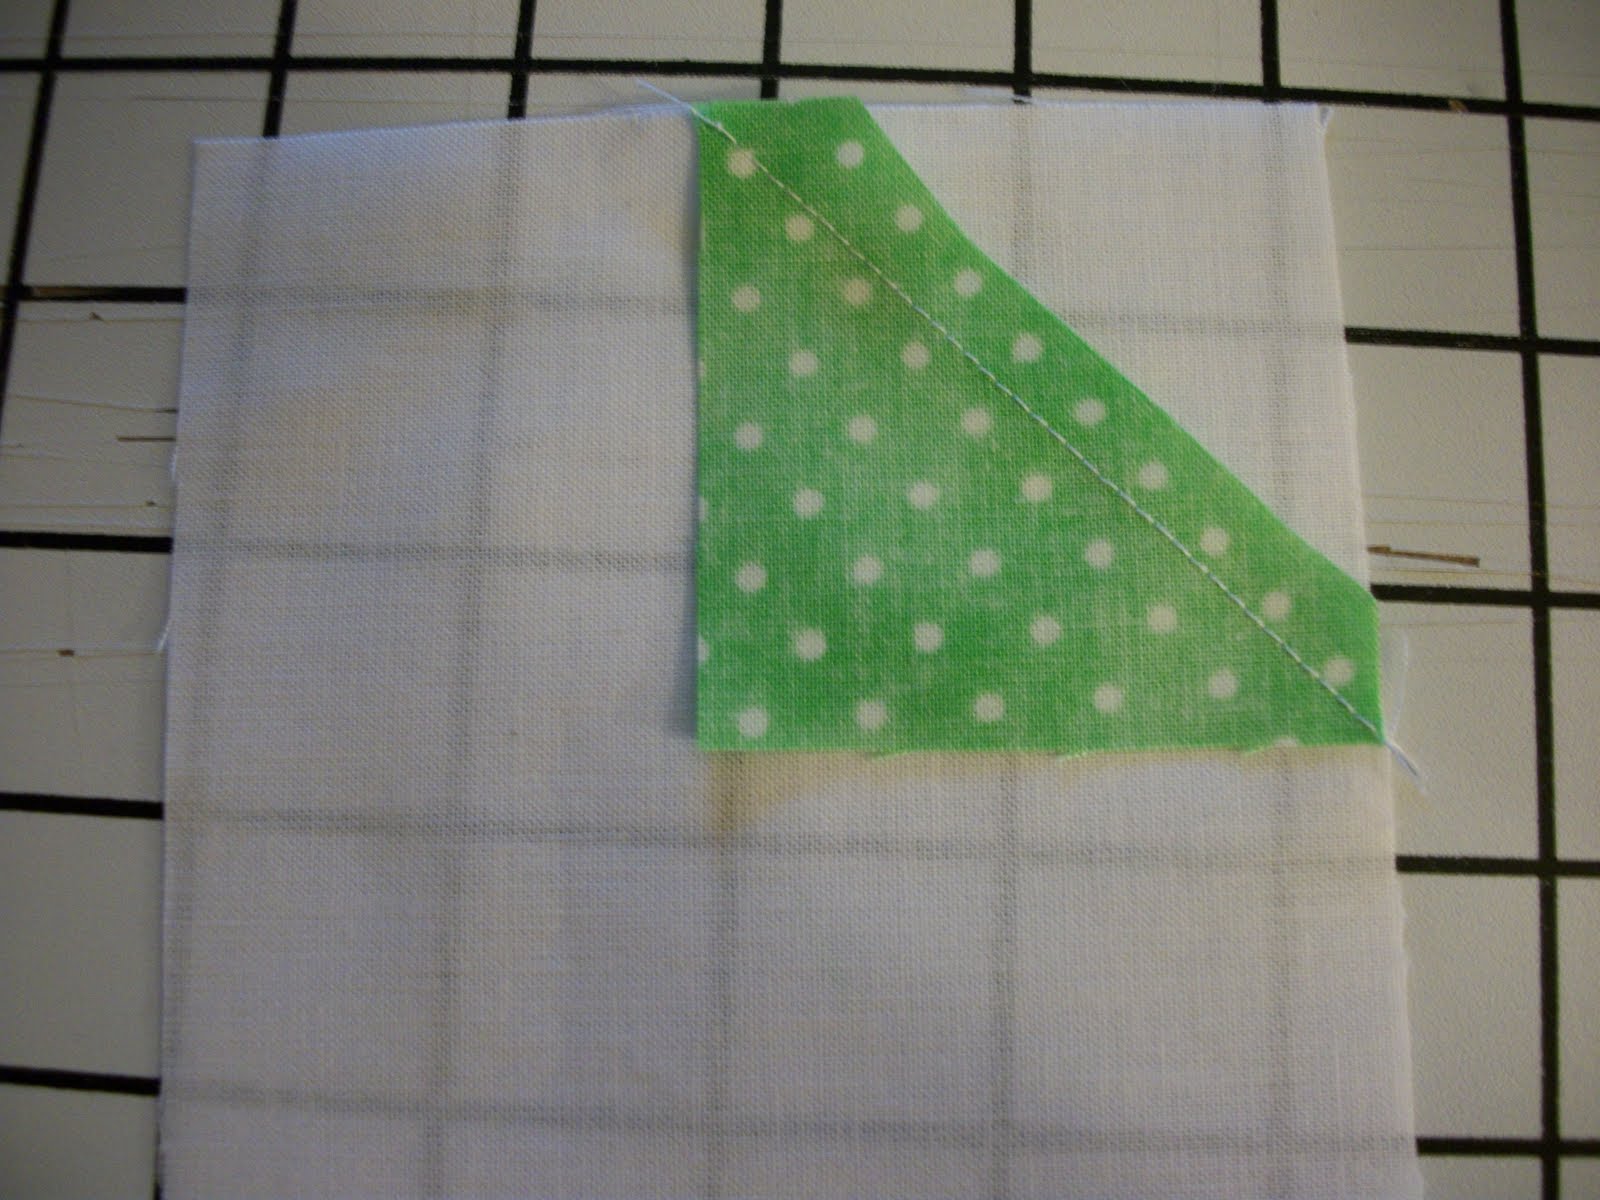
6. Press all triangles to the white point, your square should look like this now.

Sha :)
Wow Sha, that is a great tutorial. Why don't you make that in booklet form so I can download and print. I must do that to about 1000 patterns I have. I learned something new from you today Thanks
ReplyDeleteYou are a time saver!!!!
ReplyDeleteAfter drawing 120 lines in the corner triangles and finding out that the pen i was using was not completely disappearing i decided to browse, because i was sure that somehow, somewhere, somebody could be so kind to share the secret to the mystery of no drawing lines on corner triangles! Now I have another 400 corner triangles to go and doing it perfectly with this method. Thank you so much.