Showing posts with label PDF Pattern. Show all posts

Thursday, February 2, 2012

Floating Squares Quilt Pattern

Introducing my newest pattern...Floating Squares


71" x 80 

You will need:

4 yards brown fabric
1 ¾ yards orange fabric
1 ¼ yards cream fabric
4 yards backing fabric


Cutting Directions:

All strips are cut WOF (Width of fabric)
14 - 5" strips brown, sub cut 7 strips into 56 - 5" squares
4 - 2 ½" strips brown, sub cut into 56 - 2.5" squares

8 - 3 ½" strips brown for the border
7 - 5" strips cream, sub cut into 56 - 5" squares
7 - 5" strips orange

8 - 1 ½" strips orange for the border
9 - 2 ¼ strips brown for the binding 


Making the 4 patch blocks:
With 7 brown strips and 7 orange strips sew a 5" strip of brown to a 5" strip of orange along the long side.
Press towards the brown.
Sub cut the strips into 5" pieces making each piece 5" x 9 ½".
Repeat with the other 6 strips to make 56 pieces.


Sew the 56 pieces together to make 28 brown and orange 4 patches


Making the Bowtie blocks:

First you need to get your machine ready. Do you have a marked line or a piece of tape along your 1/4" line? Just about everyone I know around here does. What you do is put your needle in the down position and raise your presser foot. Insert a ruler against the needle and lower your presser foot. Line up a line on your ruler perpendicular to a line on your machine table so you know your ruler is straight, ie. the 4" line on the ruler. Then with a fine point sharpie draw a line against the ruler or place a 1/4" piece of tape in the same spot. I didn't have any 1/4" tape when I did this so I used a piece of painters tape that I cut with my rotary cutter to 1/4". And don't worry about the sharpie, you can always remove it with denatured alcohol.


With the 56 cream 5" squares and the 56 brown 2 ½" squares:
Place the brown 2 ½" squares on the top right corner of a cream 5" square. Make sure they edges are even.


Start sewing at the place where the top left corner of the brown square begins. Keep the bottom right part of the brown square even with the tape line on your machine and continue sewing till you reach the bottom right point of the brown square.


Make 56 of these
Trim the brown triangle piece that is closest to the cream point off. In other words the part you will not see. This will keep the integrity of the square in case your points are a little wonky
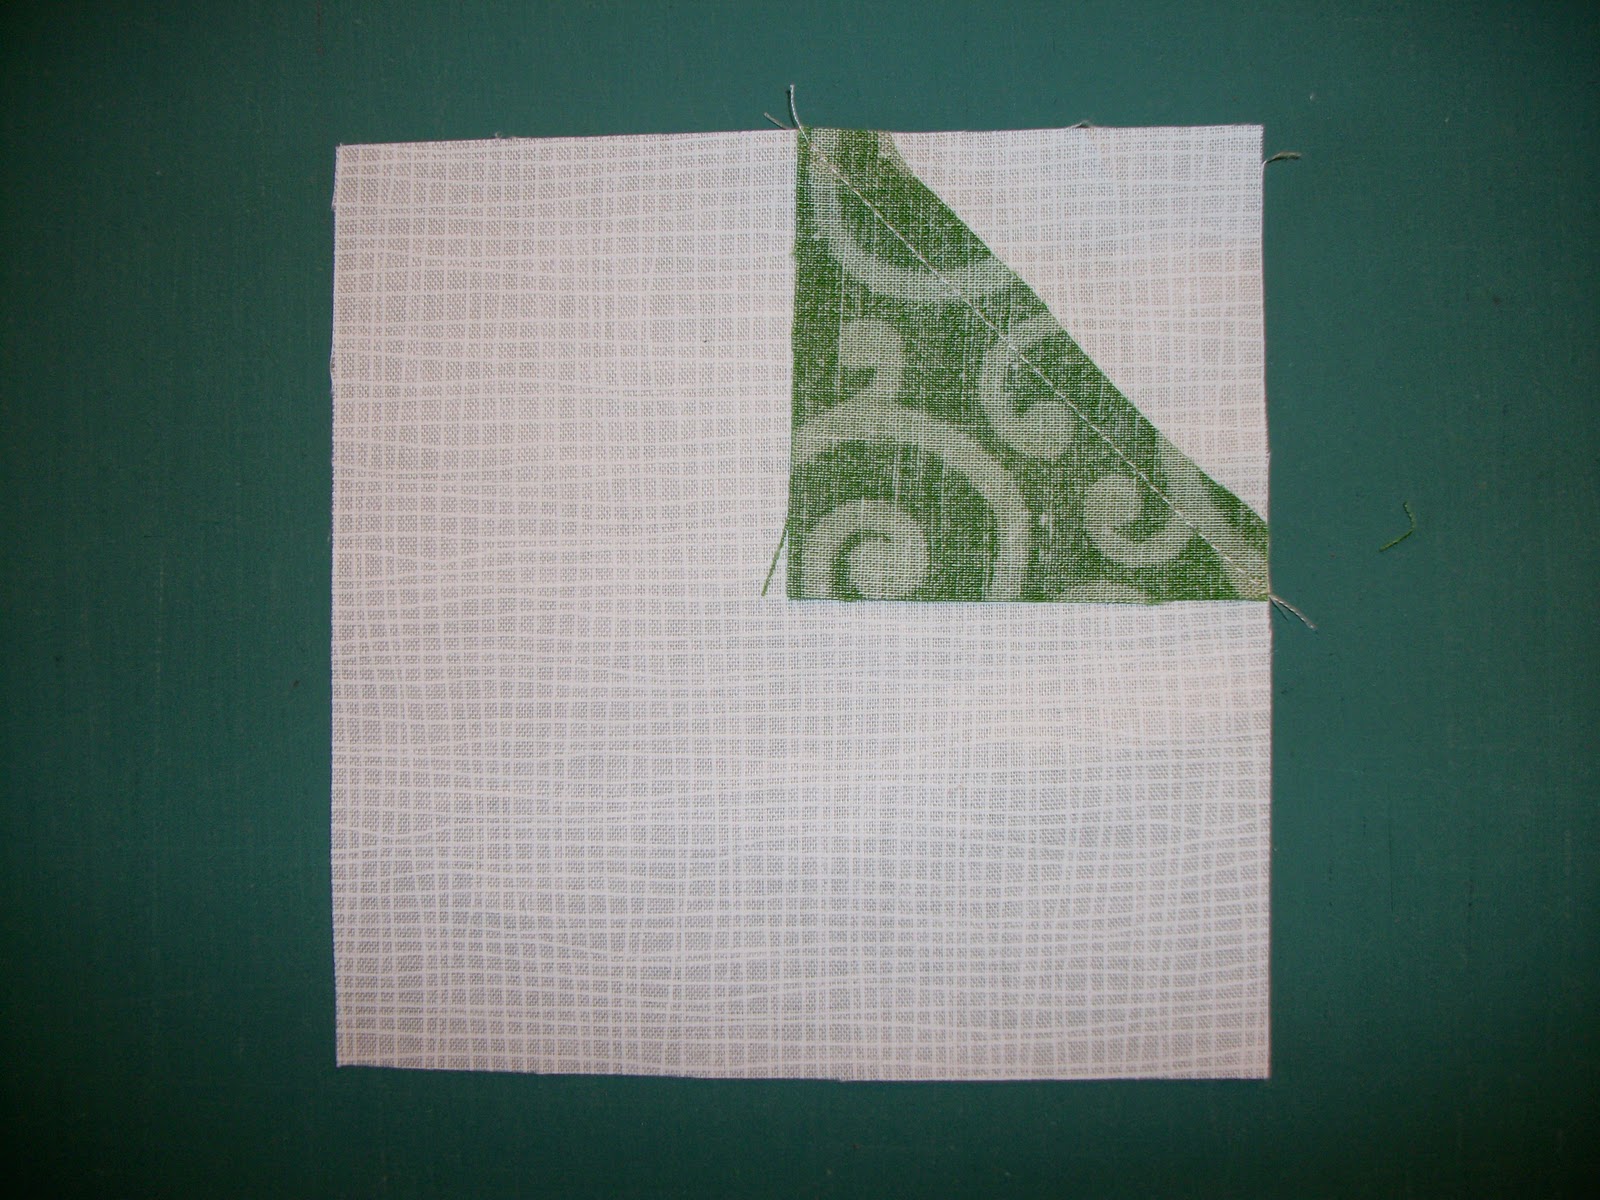
  
Press the points over and you will have 56 connector squares


Sew a connector square to a brown 5" square. Be sure they are sewn together like the picture below. Make 56 sets.


Sew 2 sets into a 4 patch to make the bowtie blocks. Make 28 blocks.


Putting it all together:

Using the diagram below sew 4 rows like this, pressing towards the left


and 4 rows like this, pressing towards the right.


Then sew the rows together

 
Adding the borders:

Sew 2 orange 1 ½" strips together along the short side. Make 4 sets of these. Sew the 2 side borders on and then the top and borders on.

Sew 2 brown 3 ½" strips together along the short side. Make 4 sets. Sew the 2 side borders on and then the top and bottom borders on.

Baste. Quilt and Bind as you would like.


I hope you enjoy this pattern!

Thursday, January 26, 2012

I'm a Snake Charmer Now

If you are looking for the Darling Heart FQ bundle giveaway click here.

I admit it...I am a new snake charmer :)

No I don't mean real snakes (just the fact that I can type that word is a big step for me) but I did charm some charm squares into a cute quilt top.


I used the Snake Charmer pattern by Little Louise Designs. The great thing about this pattern is that its available as a PDF from The Fat Quarter Shop! This is my favorite way to purchase patterns. I can save them to IBooks on my Ipad and have it ready whenever I need it.

Instead of a charm pack, I used 7 FQ's from my Darling Heart Garden FQ bundle and made it a little wider and longer. The pattern is so easy that adding to the quilt is easy. There's no real quilt math to do.

And it uses one of my favorite techniques, connectors. If you missed my connector tutorial you can find it here.

You might have noticed that it's not all the way done yet, there's 2 reasons for that (aka my excuses):
1. I have been slaving away trying to finish my son Tyler's quilt before he goes back to school. I'm very sad to say that I did not accomplish that goal, but I'm very close. All I have left to do is the binding. It's a new Original Craizee Corner pattern so I can't share it until I get it all finished and written up. But Tyler loves it and I hope you will too.
2. I decided on a single fabric border and didn't order it until Sunday. Here's what I am using for the border.


This fabric is from the other colorway in the Heart Garden line called Beloved Heart Garden. I want the border to pull any red out of the snakes to make it pop more.  

But I do plan on finishing this quilt this weekend. I am going to send it to my Mom for Valentines Day. 

I also want to share an email I got from a follower yesterday. Alyce wrote me:

Awww, so pretty!!
I just wanted to share my creation from last night inspired by your mug rug yesterday
!
http://justsewblossom.blogspot.com/2012/01/valentines-mug-rug-candy-love-hearts.html


I was so excited to learn that Alyce used Monday's tutorial to make her own mug rug. She modified it a bit, which I think is awesome and something I do often. They say imitation is the sincerest form of flattery, well this just about knocked my socks off! As a blogger you never know if anyone's really reading the blog or if you are reaching anyone. This totally made my day, along with the other great comments y'all left this week. If you make any of these projects I'd love to hear and see them too :) 

Here's my question for today, what would you make if you won this awesome FQ bundle of Darling Heart Garden from the Fat Quarter Shop?

Come back tomorrow for another V-Week project. I have to tell you a secret...It's not done yet. I am taking a class tomorrow and that will be the last project for the week.

Saturday, January 14, 2012

My Week

It's been a strange week, but I finally got my quilting mojo back and got quite a bit done. I can't go into all the details, but I can show you a few things. All I can tell you is that I have joined some swaps and committed to a few blog hops, as well as planning out the rest of January and February.

Here's part of a table runner I made for The Berry Patch. The colors are much brighter in person. I still need to put on the binding. This is made using my table runner pattern. I hope to have this done today.


Here's a table runner I have been working on. This is going to be part of the Quilter's With Modern Tools Valentines Blog Hop. I still have to do some applique in the center.   


I also started working on my first Dresden Fan/Plate this week. Next week is Nifty Notions Cut For The Cure Ruler week. This month's ruler is the 22.5 degree wedge so you will be seeing quite a few things like this all week long.


I've also been working on Tyler's quilt this week. I just need to put on the borders and quilt and bind it. I have 1.5 weeks to get it done so I am confident he will be going back to Johns Hopkins with a nice warm quilt. He helped me design it, I am calling it Floating Squares. I will have a tutorial for it sometime this month, but I couldn't wait to show it to you!


Did I mention it was Valentines week in my house? Or I felt like it was since I got all my Valentines fabric out and started on some mug rugs, the table runner and this quilt. It's the Snake Charmer quilt pattern. There will be black in between the rows. I am going to bring this to Sit and Sew at the Berry Patch today to work on.


With all the football games on this weekend (Go GIANTS!!!) I will have plenty of time to get more done.

What did you do this week? I'd love to see it.


Thursday, November 17, 2011

UnNamed Block

If you are looking for the Nifty Notion Rulers giveaway click here.

A few weeks ago I was asked by Jane of QuiltJane to share a new block I had designed. I said yes and was very excited. Then confusion settled in and for some reason I got this mixed up with another upcoming blog hop I am in. So I am sorry if you came here earlier to see this block post. Between my confusion and not knowing the time difference (plus internet problems this a.m.) this is a bit (well maybe more than a bit) late. 

If you are visiting from QuiltJane please have a look around.
I am excited to be part of the Desperate Houswives Quilt. Jane is showing us 100 quilt blocks, 2 every week.

Today I have a block that was used in my first pattern, which was published last week. I call the table runner Countdown to Christmas


I have yet to decide on a block name. So I need your help in naming it. What do you think?
The table runner is made with 12" squares, but I am going to make the block a little smaller with directions for an 8" square to fit into the Desperate Housewives Quilt if you are making it. See the original pattern for the 12" version.


Note - I have linked back to other tutorials I have posted on my blog. You can follow these directions or make the HSTs by your preferred method. The finished squares will be 2".
You will need

¼ yard red fabric
¼ yard white fabric
¼ yard green fabric

Cut 4 - 2½” squares and 8 – 1½” squares out of the green fabric.

Following the directions found here make 12 red/white Half Square Triangles from 2½” strips. Note - If you use an alternate way to make HSTs make sure they are 2 1/2" after squaring up.
On 8 of the red/white HSTs you will be sewing the green 1½” square onto the white part. See this tutorial to learn to sew on connectors.
8 of your red/white HSTs will now look like this.

You will now have 3 different type of blocks.
A.      4 - Green 2 ½” squares,
B.      4 - Red/white HSTs
C and D. 8 - Red/white HSTs with a green connector.

Make a 4 patch using this pattern, repeat to make 4 – 4 patch blocks.

Sew the 4 – 4 patch blocks together according to the diagram below.
Note - C and D are the same block.


This block will measure 8 1/2" unfinished.

Thanks Jane for letting take part in the Desperate Housewives Quilt Block Show

Monday, November 14, 2011

Call me The Craizee Ruler Lady!


Welcome to the first installment of the Craizee Corners Specialty Ruler Series! This monthly series will feature a new Nifty Notions Cut For The Cure Ruler and will have a tutorial on how to use the ruler, patterns, projects and other info about the ruler. Plus Brewer Sewing will be sponsoring this series and will be giving away 2 sets of rulers a month!

How this came about...
Anyone who tweets with me knows that I love love love half square triangles (HSTs). I think one of the reasons I love them so much is that I have a fool proof way to make them very easily, in any size and without having to trim. After all who wants to add another step to quilt making. After I started using the HST I moved onto other Nifty Notion Rulers. I was amazed at how easy all of these rulers were and how the worked perfectly together.

While at Fall Market last month I met Kaye England who is the designer of the Nifty Notion Cut For The Cure Rulers. The next day I had a meeting with Brewer Sewing and pitched this series. They were very quick to jump on board and a new friendship was formed. So now I get to share my love of these rulers with you! Plus I love the added bonus of a donation made to the Susan G Komen For The Cure Foundation for every ruler sold.

Caveat...as always I will be very honest in my review of the monthly ruler. I would not have started this series if I was not head over heals Craizee about these rulers. I have tried many other ways to make these triangles and this is by far the easiest and most accurate I have found. Plus since there is no need to trim it saves you lots of time! Who doesn't want that when piecing?

This month we will start with HSTs. They are the most basic and most widely used triangle in quilting. For those of you that don't know what a HST is here's a pic. These were made using a HST ruler with no trimming at all. One of the great things about this technique is that where the dog ears are shows you there the ¼” seam allowance is.


Here's how to use the HST Ruler. PDF file available here)

Step 1: Look at your pattern and see what the finished square will be. If the block is 12” finished that means the unfinished block will be 12½” It’s the same for these squares. If the finished square will be 3”, simply add ½” to the finished size to get your strip size. In other words, the square will be 3½” which will finish to 3” once sewn into the block.

Step 2: Cut 2 strips of fabric, right sides together, the size of the strips needed.

Step 3: Cut the selvage off of the 2 strips or even them up if the selvage is already cut off.

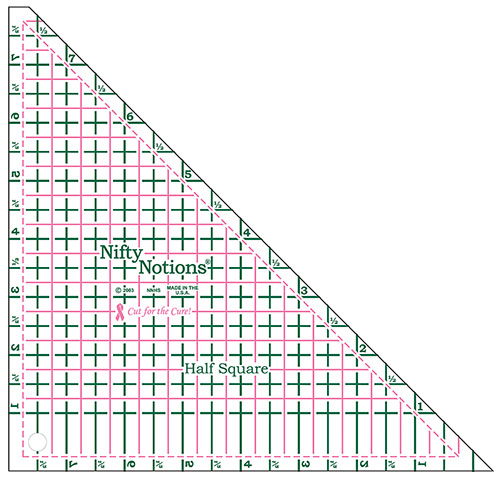
Step 4: Place the Nifty Notions HST ruler on the fabric so that you can read the logo. Line up the left straight edge with the size of the strip. Notice the flat notch at the top. Cut along the right diagonal of the ruler.


Step 5: Flip the ruler over so that the diagonal line of the ruler is aligned with the diagonal line you just cut. Cut along the straight side of the ruler.


Step 6: Continue until you have the correct number of HSTs cut.

Step 7: Start sewing at the flat tab of the HST. This is your ¼” seam line. Put the needle in right at the top left corner and sew down the diagonal using a ¼” seam allowance. Repeat for all HSTs. Do not pull the fabric, just let your machine feed it thru.


Step 8: Press in the direction needed. I find it best to set the seam by pressing the seam with the right sides together with the top part being the direction you want the seam pressed. Then flip the top half open and press the seam open. The square should measure the same size as the strips, in this case 3 ½”, which is 3” finished. There is no need to trim these at all and there will only be 1 set of dog ears to trim if you want to.

What do you think about this technique? This meets 2 of my 'rules'...1. I will do anything to not have to draw on a piece of fabric without compromising quality. 2. I don't believe in trimming, if it's done correctly there's no reason to have to trim. 
If you are wondering where you can buy a Nifty Notions Cut For The Cure Ruler check with your Local Quilting Store (these are exclusive and not found in the bog box stores), Kaye Englands store or The Berry Patch. We will have a comprehensive list soon.
Now for the FUN part! Brewer Quilting and Sewing Supplies is giving away 2 sets of rulers. The rulers in the set are the Half Square Triangle and the Quarter Square Triangle (QST). With these 2 rulers you can make flying geese and many other things. The QST series will be next month so you will be all set to try that one too.

To enter Novembers Nifty Notions giveaway you do not have to be a follower, but it would be great if you did.

For entry #1 go to the Brewer Nifty Notions page and tell me which ruler you would like to learn about.

For entry #2 go to Brewer's Facebook page and Like them.

There you go, as usual not more than 2 ways to enter!

Mr. Random will draw a winner on Saturday, Nov 19, 2011! 

Sunday, November 6, 2011

My first pattern...AKA Countdown to Christmas Tablerunner

Here's my very first pattern. I love all things Sweetwater including Countdown to Christmas. You can get some Countdown to Christmas at The Fat Quarter Shop.

Here's the PDF version.

Countdown to Christmas Table Runner


Fabric:
¼ yard Green                                                  16”x40” piece of batting
¼ yard Black                                                    16”x40” piece for backing     
½ yard Red
½ yard White

Note - this can also be made scrappy as long as you get the same number of squares cut.

Strips are always cut width of fabric (WOF)

HST = Half Square Triangle

Cut (the other pieces will be cut according to the technique you use for your HSTs)
12 green 3 ½” squares
24 green 2” squares

You will need to make 8 black/white HSTs
You will need to make 28 red/white HSTs

Note – If you are using a HST ruler make sure you read the how to directions first.

Here’s 2 different ways to make the HST’s.
Using a HST ruler:


Cut
2 - 3 ½” strips of red
3 - 3½” strips of white
1 - 3½” strips of black.

Place a white and a black strip right sides together. Starting with the ruler facing
this direction (like a right triangle) cut your first set of triangles. Usually it’s the direction that has the writing right side up so you can read it.


Flip the ruler and cut the second set of triangles. Continue until you have 8 black/white triangle sets and 28 red/white triangle sets cut.


Starting with the part of the triangle set with the flat tab, line your needle up with the left corner of the tab and sew using a ¼” seam allowance to the bottom of the triangle.


Make 8 black/white and 28 red/white HSTs

** See the pressing directions before pressing.

Traditional HSTs:

Cut
2 - 3 7/8” white strips, sub cut into 14 - 3 7/8” squares
2 - 3 7/8” red strips, sub cut into 18 - 3 7/8” squares
1 - 3 7/8” black strip sub cut into 4 - 3 7/8” squares

Put a black and a white square, right sides together.
Draw a diagonal line on the white square from point to point.
Sew using a ¼” seam on both sides of the drawn line.
Using a rotary cutter, cut along the diagonal line to make 2 HSTs. Trim to 3 ½”.

Make 8 black/white HSTs and 28 red/white HSTs.

Pressing: Very important

Press half the black/white HSTs towards the white and half towards the black.
Press half the red/white HSTs towards the red and half towards the white.


Adding the Connectors:

On all 8 black/white blocks and 16 red/white blocks (8 pressed towards the red and 8 pressed to the white)  you will be adding a 2” green connector to the white half of the HST block.

See this tutorial http://craizeecorner.blogspot.com/2011/10/corner-triangles-aka-connectorsa.html for an easy no-draw way to attach connector squares

OR you can do it the traditional way of drawing a diagonal line on the 2” squares and sew along that line.

I suggest only cutting the middle piece (the unused part of the connector) and not the bottom 2 layers, that will keep the integrity of the square and make piecing easier.


Putting the table runner together:

You will have 4 different squares at this point.
A – 12 - 3 ½” green squares
B – 12 - 3 ½” red/white HSTs with no connectors
C – 8 - 3 ½” black/white HSTs with green connectors
D – 16 - 3 ½” red/white HSTs with green connectors

Layout the blocks following the diagram below. Starting with the top left Block B alternate the direction the blocks were pressed. This will make matching the points easier. Make each star block and put them together.  To make sure the points match nestle the seams together on the diagonal when you are sewing the blocks together. The points will meet at one point.


Baste, Quilt and Bind as you normally would.

There you have it...a table runner that can be made for any season. Instead of the 4 A blocks put together you can fussy cut a 6 ½" square to go there.