Showing posts with label Guest bloggers. Show all posts

Wednesday, March 7, 2012

Today a friend of mine is visiting to kick off the EQ7 part of the celebration! Last month I helped Sally transfer files from the Quilt Design Wizard to a JPEG file and when I saw here beautiful quilt designs I knew I had to have her visit Craizee Corners. She has some great new designs to show you and guess what? She is working on her very first pattern too. So make sure to visit her blog Sally's Quilting Corner often to see whats shes up to!


Hi quilters my friend Sharon at Craizee Corners has reason to celebrate. Her blog is one year old...She sure has had an exciting yr... All of her creations are so beautiful and the talent, well what could I say about her talent that everyone else hasn't already said...She graciously asked me to come visit her blog and tell her what I like about EQ7 because she is celebrating EQ7 week. Well I have a copy of Quilt Design Wizard and love it, but there are limitations then I was very lucky to get the EQ7 program and just love it!!!  The fabric selection along with the colors alone can be overwhelming because there are so many possibilities to work with... Then you get into designing your patterns with the block library and all I have to say is  OH BOY!!! I have been playing a lot with this program and I have created a few things that need some editing, but I thought I would share... Let me know what you think... I can't imagine if they add an update to this program, I may have to change careers...
The first pattern I created was from Quilt Design Wizard but I reconfigured things and created it on EQ7, and this is what I came up with. I called this wall quilt Crossflower Boxes. I think for my first one it didn't turn out too bad... What do you think...

Photo is the property of sallysquiltingcorner.blogspot.com and copying is prohibited, March 2012


These photos and design is owned by

www.sallysquiltingcorner.blogspot.com and copying of this photo is prohibited. March 2012.

I would like to thank Sharon for inviting me to share her excitement about the blog birthday and about celebrating EQ7 week... I hope you all have a good time seeing my creations.

Aren't those designs great? I know that I plan on making the Crossflower Boxes quilt as soon as the pattern is available. I'm thinking of using bright batiks, what do you think?

So now that you have seen the first special post of the month can you guess one of the things for the giveaway? I'll be posting how to win it tomorrow so stay tuned!

Saturday, March 3, 2012

Not So Scrappy

A few weeks ago Jess & Jo from Bloomerie sent me a six pack of fat eighths in the most wonderful color combination.


The challenge was to create something with these six F8s to show what can be made. This challenge was perfect for me since I have been working on being a bit more scrappy.
That F8 bundle sat and sat in my to do basket until yesterday. I am not ashamed to admit that little bundle of happiness was petrifying me. Then all of a sudden I had a moment of clarity. The quilt pattern that I make with jelly rolls that I have no plan for is the Jelly Roll Race quilt. I wasn't even sure of what the finished size would be, but that didn't scare me. Of course I could have figured it out by doing quilt math, but where's the fun in that?

I cut the strips 2" instead of 2.5" and got 4 - 2" x 21" strips from each F8. When I sewed them end to end I tried to be as scrappy as possible for me. Then I filled a bobbin and off to the races I went. I started the race at 10:51 and finished it at 11:38 including a 4 minute call from my son. and I sew very slowly, although if you have ever taken a class with me you would not think that. For some reason when I am in class I get nervous and sew very fast and haphazardly, but that's a story for another time.

So here's the finished product. The finished size is 24" x 29". It's a little big for a table runner, but perfect for a table topper when we have company and I use the covered desk as a sideboard.


I had planned on doing some free motion quilting on this yesterday, but for some reason the BSR is not working. I have been to the store 3 times to make sure I know how to use it and the foots just not working so off to the store I will go today. They are wonderful at The Berry Patch and I am sure that they will fix me right up :)

I'd like to thank Bloomerie for letting me take part in this fun challenge.

Stay tuned this month for lots of excitement. It's Craizee Corners 1 year anniversary and some of my friends will be around to help me celebrate in a big way!

Wednesday, January 25, 2012

Valentine Table Runner & Where I'll Be

If you are looking for the Darling Heart Garden FQ bundle giveaway click here.

Do you cook for your someone special on Valentines day? I do. I plan the menu for days and make a big deal of it. We eat at the grown ups table with real plates and silverware and everything :)

I don't know how this happened, but with all the table runners I have made I've never made a V-Day one. Well that has changed. I now have this table runner to use every year!


It's made the same way as the Mug Rug from Monday.

I can't give you the tutorial just yet, that has to wait till February 1st when I kick off the Valentines Day Showcase at Sew Bitter Sweet Designs. 

Another guest blog post I have coming up is on February 8th. I'll be sharing another tutorial for a fun Valentines project at Sew Sweetness' Blog.

And my Valentines projects will end with a Red/White project as part of the Quilters With Modern Tools blog hop. If you are not familiar with this group head on over the Insights From SewCalGal blog and check it out.

But if you just can't wait for the tutorial here's a hint...
The center is 8.5" and the strips are from a jelly roll.

I hope you are enjoying this series, I know it makes me happy to work on these projects with all this great fabric filled with hearts and stuff.


Sunday, December 18, 2011

FatQuarterly 12 Days of Ruby Star


Have you seen the FatQuarterly blog lately? They are doing a great series called The 12 Days of Ruby Star featuring the Ruby Star lines by Melody Miller. 12 different bloggers will share their gift ideas that they made with some fabric that Melody so generously sent out. And guess what? I'm one of the 12! I will be guest blogging on Thursday, Dec 22nd!

Friday, December 2, 2011

Welcome to the Blog Tour of Quilts

Today I am happy to be part of the Blog Tour of Quilts that Sally from Sally's Quilting Corner put together. To those who hopped from Sally's blog welcome to Craizee Corners! If you are a follower of Craizee Corners please check the rest of the hop out :)

I had planned on making a wall hanging and a new tree skirt, but my gallbladder decided it needed to be taken out which sidelined me for a while. That put a dent in my plans so I don't have anything new to show you, but I do have something old that I haven't posted about before.

22 years ago we were living in New Hampshire. I wanted to learn to quilt then so I signed up for a class to make a Christmas tree skirt. I had no idea what I was doing and this was the only thing I made back then.


The 5 points are made of a log cabin started with a diamond. The strips were 2" each and the diamond in the middle was 4". It was done with the quilt as you go method. I started with the diamond shape on top of the batting which was on top of the backing. Then I sewed on each piece, right sides together and then flipped it. Once I get some time I will write a tutorial for this up to explain it better.

This year we will only be putting up a small tree so I will have to make a small one at some point during the month, after I have recooperated that is.

Another Christmas project I made was the Countdown to Christmas table runner. You can get the free pattern here.


What kind of holiday projects are you making this year?

The next stop of the Blog Tour is Scrap-bags by Jamie Kalvestron...please hop on over to see her great projects.

Thanks for joining me on this Blog Tour of Quilts, I hope you enjoy the rest of the tour :)

Thursday, November 17, 2011

UnNamed Block

If you are looking for the Nifty Notion Rulers giveaway click here.

A few weeks ago I was asked by Jane of QuiltJane to share a new block I had designed. I said yes and was very excited. Then confusion settled in and for some reason I got this mixed up with another upcoming blog hop I am in. So I am sorry if you came here earlier to see this block post. Between my confusion and not knowing the time difference (plus internet problems this a.m.) this is a bit (well maybe more than a bit) late. 

If you are visiting from QuiltJane please have a look around.
I am excited to be part of the Desperate Houswives Quilt. Jane is showing us 100 quilt blocks, 2 every week.

Today I have a block that was used in my first pattern, which was published last week. I call the table runner Countdown to Christmas


I have yet to decide on a block name. So I need your help in naming it. What do you think?
The table runner is made with 12" squares, but I am going to make the block a little smaller with directions for an 8" square to fit into the Desperate Housewives Quilt if you are making it. See the original pattern for the 12" version.


Note - I have linked back to other tutorials I have posted on my blog. You can follow these directions or make the HSTs by your preferred method. The finished squares will be 2".
You will need

¼ yard red fabric
¼ yard white fabric
¼ yard green fabric

Cut 4 - 2½” squares and 8 – 1½” squares out of the green fabric.

Following the directions found here make 12 red/white Half Square Triangles from 2½” strips. Note - If you use an alternate way to make HSTs make sure they are 2 1/2" after squaring up.
On 8 of the red/white HSTs you will be sewing the green 1½” square onto the white part. See this tutorial to learn to sew on connectors.
8 of your red/white HSTs will now look like this.

You will now have 3 different type of blocks.
A.      4 - Green 2 ½” squares,
B.      4 - Red/white HSTs
C and D. 8 - Red/white HSTs with a green connector.

Make a 4 patch using this pattern, repeat to make 4 – 4 patch blocks.

Sew the 4 – 4 patch blocks together according to the diagram below.
Note - C and D are the same block.


This block will measure 8 1/2" unfinished.

Thanks Jane for letting take part in the Desperate Housewives Quilt Block Show

Thursday, November 10, 2011

A Mini Swoon Block...Amazing!

If you are looking for the Ruby Designer Select FQ kit giveaway click here.

The next guest blogger is Ramona from Ramona Rose. She is here to show you the tinyest little block, I guarantee you will be amazed!


Hey Everyone!

Like Tracey this is my first guest post, and I’m SO EXCITED! Thanks Sharon for inviting me over here today!


I started Swooning about a month or so ago, when I first pieced a Swoon quilt for Jennifer Sampou’s Quilt Market booth (for her new fabric line, Fiesta)... Angela Walters of Quilting is My Therapy did the quilting, and I WISH it was my quilt, as it’s GORGEOUS! (Jennifer’s booth even won a blue ribbon!)


I’m addicted.


I made a sample block for a class at my LQS, SewModern, with Christmas fabric. I think I might have to make it into another whole quilt; it’s just SO pretty. (BTW, the Xmas block fabrics are Kona White, Groove Geo Stripes Green, and Quilter's Linen Crimson)


I have a really hard time getting rid of scraps though, especially nice triangly ones like you’ll have leftover if you make a Swoon block (or quilt)... But if you’re only doing 1 block (like for a bee), what do you do with the leftovers?


How about a TEENY tiny mini-Swoon?


(full disclosure, I only used the Quilters Linen and Kona scraps. Groove was actually too large a print for this, but luckily I had some Bliss scraps, and this print is exactly the right scale for a mini-Swoon.)

This mini-Swoon is mostly paper pieced, and measures just 3 inches square!!!

I admit, I'm not good enough at math to figure out the percentage there, but just in case you don't know, the real Swoon blocks measure 24”!

Here it is in another colorway, with crayons for scale:


I admit, I usually press my seams to the side, but when you make a Swoon block (especially this small), make sure you press your seams open!


I'm still unable to answer my husband's bewildered “why?” about making a mini-swoon, but I do know that I LOVE it. Almost as much as the original.

I couldn’t get my hands on the Ruby prints I wanted in time to make a sample, but won't the dots be PERFECT for this?

Isn't that amazing! When Ramona sent me a sneak peak a few days ago I was blown away by how great it looked and how tiny the pieces are. And BTW the mini block is only 12.5% of the size of the big block (or so says my brainiac Husband)

If you are looking for the Swoon pattern heres a link for the PDF version and the paper pattern. Both are available at the Fat Quarter Shop along with Ruby!

You have about 36 more hours to enter the Ruby giveaway, remember to enter today!


Kayli's Bliss

If you are looking for the Ruby Designer Select FQ kit giveaway click here.

Today's guest is Kayli from Quilt Finishing. She is here to share with you all the quilts she blissfully made. You will love her quilting work, it's just beautiful.
I'm a big fan of Bonnie and Camille, they are a mother-daughter team that is very talented and I love their designs and style! They each have their own pattern companies and they join together to design fabric to die for. I have loved red an turquoise together since I was about 12 years old and I can't get enough of it. The red in the Bliss line that Bonnie and Camille designed is so bold and perfect. I like that the turquoise is soft and fits so well with the red. This line also included green, pink, browns, and white which all go perfect together to create "bliss" for quilters like me. Now I know where they got the name!

When the Bliss line first came out I bought a charm pack and couldn't decide what to do with it for a while but then I saw this tutorial last year and I wanted to make it with just one charm pack and do a little table topper.

                                    
It was super fast to put together, I had a few left over charms so I put together a super scrappy border that went just perfect.
                                    

I couldn't stop there, I had to have more! I bought a jelly roll and some yardage and did  the Picnic Rollup quilt from Thimble Blossoms (Camille). This quilt was so fun because I could pick what colors would be together in each block.


It is really hard to choose a favorite, but I think this block was my favorite:


 Look at all those lovely colors together!


 It was really fun to quilt too, I quilted this myself and it was the first time I ever did feathers. I wish that I would have done them bigger, but I hadn't learned how to do them really good yet. I'm really happy with the quilting that I did on this and I love it.


 Bliss fabric was designed in flannels as well, I got flannel yardage to back this, it is so soft and comfy! And this is probably my favorite print from the line so why not have 4 yards of it!?!


When Quilt Market was in Salt Lake City in the spring, I was lucky enough to go with some of my Salt Lake Modern Quilt Guild friends. We definitely had to meet Bonnie and Camille! They are so sweet and so beautiful in person and I am so inspired by Camille especially because she is young and has really young children like me and has her own business and is such an artist!

Kati, Camille, Me, and Brooke
Bonnie was taking the picture, we should have gotten an outsider to get her in with us!
I love the new Ruby line too but I haven't gotten anything made with it yet.
I hope to get some soon!
Kayli

I am so jealous of all that Bliss that Kayli got to work with. Which project do you like the best?

Come back tomorrow to see what Ryan Walsh has to show us, I know it will be fabulous!

Wednesday, November 9, 2011

Ruby Table Runner

If you are looking for the Ruby giveaway please click here.

Today Tracey from The Peony Teacup has an adorable table runner made with Ruby. It uses one of my favorite patterns.

Hi, I'm Tracey from The Peony Teacup and I'm super excited to be blogging with you here on Sha's Craizee Corners! This is my first time guest posting, so be gentle with me ;)

Just like Melissa did on Monday, I will be showcasing a project that I made using Bonnie & Camille's Ruby. How gorgeous is that fabric? I love the aqua/red combination, it's just so happy.. you know?


I'd originally planned a different project with my Ruby fabric, but a girlfriend managed to convince me that she *really needed* my other Ruby charm pack to make some dresden plate cushions, so I had to come up with a new idea.

Fortunately for me, Sha's Bonnie & Camille week coincides with another girlfriend's 30th birthday. What better gift to give than.... a Ruby table runner?!


Do you think my friend will like it? I sure hope so!
I used a "Disappearing 9 Patch" pattern to make the table runner, and will post a tutorial on my blog in case anyone is interested. It only used 27 charm squares (3 x 9 patch blocks), so while I decided to "turn & top stitch" my table runner, you could easily bind it with the remaining charm squares. I used some white/blue dot fabric from my stash to back my table runner, but I also think it would look gorgeous if you used 2x charm packs and made it reversible - perhaps an aqua side and a red side? Or maybe Ruby on one side and Kate Spain's Good Fortune on the other.. (I plan to make a Disappearing 9 Patch Quilt with that combo!)


The problem is that now I've made my table runner, I'm even more in love with Ruby and I wish I hadn't declared a fabric buying ban for the rest of 2011 because I *really* want to make my girlfriends some Ruby mug rugs as a part of their Christmas gifts! Fabric buying bans don't include Christmas presents do they?


Thanks for sticking with me through to the end of the post, and thank you to Sha for having me. :) I really enjoyed making my Ruby table runner (and it was super-fast too!) and being able to share it with you! I'll be showcasing it at my local quilting friendship day later today, and then I'll wrap it up and gift it to my girlfriend at her Mad Hatter's Tea Party on Sunday!

What a great table runner! I say to get some more for your other friends' gifts. You have to get something for them so buying the fabric to make something for them is no different than buying them fabric for a gift.

Don't forget to check out Tracey's blog The Peony Teacup. She just did a tutorial on sashing tumblers that I can not wait to try.


Monday, November 7, 2011

A Stunning Ruby Quilt

If you are looking for the Ruby giveaway click here.

Welcome the first Ruby guest blogger! Melissa has a stunning quilt to share and a tutorial on how to make this quilt. What I like about Melissa is that she seems to like half square and quarter square triangles as much as I do.

Hi, I'm Melissa from Sew BitterSweet Designs. When Chef Sharon asked for guest bloggers to blog about Ruby by Bonnie & Camille I stood up and waved my arms! This line is gorgeous and so versatile! Just look at all those fabulous colors!


As soon as I saw Ruby I knew it would make some absolutely stunning flying geese (this line actually launched my secret romance with flying geese....shhhhh don't tell my husband - he wouldn't understand!). I used an entire jelly roll of Ruby and created this quilt:


I named this quilt Flying Flocks and I am giving it to a friend's daughter for her first birthday! It is bright and cheerful. The geese make a fabulous faux chevron pattern. Ruby is perfect for any little girl - with it's fun funky flowers and youthful color palette.

As I said, Ruby kicked off my romance with geese, here is another block I designed for a swap I participate in. My partner requested reds and aquas, Ruby was the perfect fit!

Doesn't Ruby look AMAZING when paired with a simple white?!?
I was also able to use more Ruby in my Bottled Rainbows Quilt that I have been working on this past month - It is featured 5 times alone in my red block!

Needless to say, I have worked Ruby into as many projects as possible since I got my hot little hands on my first jelly roll in September. It is such a fun line and I am certain at least one more project will come out of it for my own daughter. She has already tried to claim Flying Flocks as her own!

If you would like to learn more about me, my quilts or see my tutorial for how I created 240 flying geese from one tutorial please check out my blog!

I am also on Twitter!

And I live on Pinterest too!

Thank you so much for having me here today Sharon, I had a blast sharing my love of Ruby!

So are you ready to make one of these quilts? I think it so stunning that I just might have to make one soon. Thanks for visiting Craizee Corners today Melissa. Make sure you check out her blog, Sew Bitter Sweet Designs.


Monday, October 24, 2011

Today Melanie from Above All Fabric is here to show you some of her wonderful projects that she made with Kate Spain fabric. From quilts to PJ's it is clear that she loves Kate Spain fabric as much as I do. 


When Sha asked who wanted to be part of Kate Spain month, I knocked people over to get in the front of the line. ;-) Kate Spain Designs + me = ♥♥ l.o.v.e. ♥♥ Seriously! And it appears I'm not alone!

Central Park Sudoku Quilt

Hi! My name is Melanie and I love Kate Spain fabric. (Along with all the other things she puts her designs onto!) And honestly, I don't want help. I'd like to keep on lovin' if that's alright with you!

Central Park Quilt

As it so happens, I will be giving some quilts this Christmas that feature Kate's fabric. This fun quilt is actually a Sudoku board. 9 fabrics from her Central Park collection. One of each in each row, column and square. The back is minky and it's just so luscious. (Plus I love that I didn't have to piece a back! Yay for 60 inches wide!!!) I know the person I'm giving this to will love it!

Terrain Quilt Top

And here is a terrain quilt top that practically put itself together. :-) I used this awesome free pattern from Moda's Bake Shop. It requires one layer cake and two charm packs (I sell both!) It's currently away being quilted. I can't wait to get it back!! I will certainly share it again on my blog!

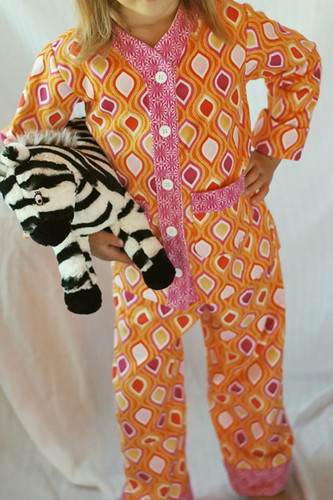
Now to be honest, I actually usually sew children's clothing, not quilts....and Kate's fabric is amazing for that as well! These pajamas are made with her wonderful (seriously....WONDERFUL) flannel.

Terrain Pajamas

These will be available as a kit by the end of the week (with just the pants as an option as well!) And let me tell you...everyone NEEDS new jammies for Christmas! That is a fact!

Alright, alright - I'll get to the real stuff! Here is a video for you on how to make a blanket that binds itself! The minky is awesome for these- or flannel! Oh....I should make some with that wonderful Terrain Flannel!!! In the video I used a print from her Central Park collection! Too cute!

Magic Binding Blanket

(You can download the PDF here.)

I'm so glad that I'm not alone for my love of Kate Spain fabric! I hope you'll visit me soon!!! I have some pretty big things that will be going on over the next 2 weeks! So check in with me. :-)

Oh yeah...you can find me on.....
my blog
my shop
flickr...which will continue to have lots of Kate Spain projects, I am certain!
Plus on twitter and facebook too!

Thanks Melanie for sharing those great ideas and the video. I think I will attempt to make some PJ bottoms soon, sometime after Quilt Market :)

Speaking of Quilt Market, if any of you are going please let me know, I would love to meet you.