Showing posts with label Tutorial. Show all posts

Tuesday, March 13, 2012

Disappearing 9 Patch and EQ

If you are looking for the EQ7 giveaway click here!

On my last post I showed you some Disappearing 9 Patch quilts I made. Then I remembered this wonderful charm pack of California Girl by Fig Tree that I got and knew that I had to use those wonderful charms for a Disappearing 9 Patch project. Plus I have the cutest mini charm pack of California Girl to use for this also. I don't have enough for a big quilt, but I am playing around with some other blocks to add to this project from other Fig Tree lines.

What would a project be without some kind of tutorial from me? And given that the series for the week is EQ7 I got some more play time with my computer as well.

One of the great things about EQ7 is the ability to bring in your own fabric swatches that you need. It's great to have that ability to really see what the block or quilt will look like. I imported the California Girl fabric swatches and had tons of fun with it.

Here's a quick tutorial on how to make a Disappearing 9 Patch quilt. Note - I am thinking of putting all my tutorials on a separate blog to make the tutorials easier to find, what do you think of that idea?

Stay tuned for my finished Cali Girl quilt :) and a giveaway of a California Girl charm pack!

Sunday, February 26, 2012

Twist Along Week 3

Now that you have your 36 patch with borders on and have best pressed or starched it, it's time to start cutting. As I mentioned before, It's a good idea to be able to cut all 49 pieces at the same time. It makes keeping track of your piece placement easier.

The Twister ruler is a square ruler with lines drawn a little wonky. These are the lines you will be lining up on the seams.

Starting at the top left corner, place the ruler along all 3 seam lines. You will only have 3 here because the border is sewn on without any seams. Make sure there are no bumps under the ruler. It's easy to get bumps since the ruler is on 'stilts'. Then cut around all 4 sides of the ruler. Be sure to no go more than a 1/4" past the sides or it will cut into the next piece.


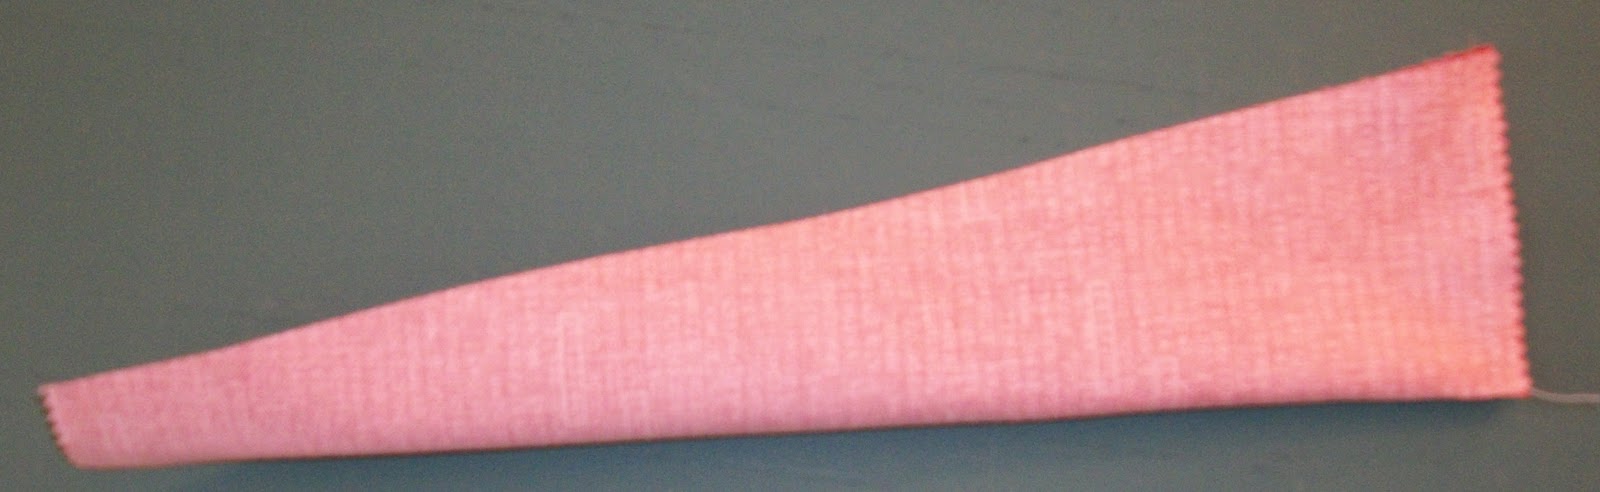
Remove the square from the cutting table and put onto a design wall or table.This is what the 36 patch will look like now.


Here's the fun part. Twist the block clockwise until the block is a straight square.


Repeat for each square, remembering to line up the lines with the seams. On any piece that has a border included there will only be 3 seams to line up with and on all the rest there will be 4. This is what it will look like after 2 squares are cut. 


Keep cutting and adding squares to finish the first row. Notice how you can see the twisted pinwheels forming.


Then start on the 2nd row. This is what it will look like after the first two squares of the second row are cut. You can see the first twisted pinwheel now.


After you have all 49 squares cut out then sew them back together just like you did for the original 36 patch, but you will have 7 rows of 7 this time. Remember not to pull the fabric when sewing it back together because it is cut on the bias and has extra stretch.


Now I just need to give this a quick press. Next week we will be adding an outside border or 2 if you want. I have some of the black Sassy with the little paisley print for the border, but an thinking of doing a turquoise for a first border.

Don't forget to link up your twister quilts on the flickr page.


Sunday, February 19, 2012

Twist Along Week 2

Are you ready to work on your Twister Quilt some more? If you missed week 1 here's the link to that post.

This week we will be putting the borders on the 36 patch you made last week. Then later in the week we will be cutting the twister squares.


If you are using 10" squares for the 36 patch you will need to cut 8 - 6.5" x WOF strips then sew 2 strips together to make 4 long border strips.
If you are using 5" squares you will need 4 - 3.5" x WOF strips

Here's a short tutorial on how to sew strips together with a bias seam.

Here's a technique I use when putting borders on my quilts. I used to sew a strip of fabric onto the quilt that was bigger than the quilt length and trim the overhang off to be even with the quilt. But that just got me a wonky quilt. The secret is to cut the opposite side borders the same length and then make the quilt fit the borders so both sides are even.


1. Lay your quilt top out on the floor and take 2 of the border pieces. Pin them to the middle of the top part. Have a helper hold where the fabric is pinned together or put a pin cushion or something else that has a little weight to it on the spot where the pins are. The middle of the quilt is the most stable and least wonky part.

2. Now smooth out the 2 border pieces over the quilt, trying not to pull the border strips or the quilt.


3. Trim the ends of the border strips off where the bottom edge of the quilt is (I use scissors). These 2 borders are for the sides of the quilt. If you cut the pieces a tad bit wonky you can straighten them up.

4. Fold the quilt top in half along the side. If the half way mark is not on a seam then finger press a crease or use a pin to mark the center.

5. Fold the border piece in half and fold to make a crease or use a pin to mark it.

6. Line up both the half way marks and pin.

7. Now pin the border to the right end of the quilt. I find it helpful to pin along the top and then one pin along the side edge to prevent any part from stretching. If it is a tad bit to small or big you can spread out the problem throughout the entire side so it won't even be noticeable. This is how you fix a too big or too small side. Now pin half way between the 2 pins and so on till the entire right half of the border is pinned. I usually like to have a pin at least every 3 inches.

8. Repeat with the left half until the entire border is pinned.

9. Repeat for the opposite side so you have both borders pinned on.

10. Sew using a 1/4" seam. Then press towards the border.

11. Repeat for the top and bottom parts.

Walaa! Borders on the quilt that have right angles for the corners!


I'd love to see your progress, don't forget to post them on the flickr page for the Twist Along.

This should keep you busy for a while. Later in the week we will start cutting the twister squares and sewing them together. That part will take the longest so I have allowed a few extra days for it.

Till next time


Friday, February 17, 2012

Go! Ahead & Show Some Love

Have you seen the Go! Ahead and Show Some Love Blog Hop? Paulette from Sweet Pea Quilting and Creations is hosting it in conjunction with the Quilters With Modern Tools group. This months blog hop is all about the color red, Valentine Day and the Accuquilt cutting system. And today it's my turn on the hop!


The project I made for this blog hop is my Dresden Love hot pad. It's kinda big for a mug rug, but kinda small for a table topper, but is the perfect size for a hot pad.


This is a simple dresden fan using a 22.5 degree ruler. For those of you that are new to my blog, I do a monthly series on Nifty Notions rulers and the ruler of the month in January was the 22.5 degree wedge. Check out all the ruler tutorials I have done for you here.

You will need
1 - 2.5" x WOF red fabric
1 - 2.5" x WOF pink fabric
1 - 5" square red fabric
1 - 8" square white fabric for background
Steam-a-Seam
1 - 1.5" x WOF pink fabric for border
2 - 2.25" x WOF red for binding
1 - 12" square red fabric for backing
1 - 12" square batting


To make this hot pad you will first need to figure out what size fan pieces to cut. 


1. Decide on the size of the fan/plate you want. For this project I wanted the fan to measure 7" across the diameter. For those of you who failed HS geometry the diameter is the size of the line drawn thru the center of a circle. 


2. Once you know how big of a fan/plate you want you can figure out what size pieces you will need. It's a pretty easy formula:

Take the diameter and subtract 2 and then divide by 2. So if you want a 7" plate/fan it works this way... 7 - 2 = 5/2 = 2.5. So the strip you cut your wedges from need to be 2.5".

3. Now that we know what size strips to use it's time to cut the strips. If you are using 2 different fabrics for the plate/fan cut your strips the desired size and then lay them out one on top of the other with right sides together. Place the ruler on the strip with the Logo face up (so you can read it). Line up the top edge with the line that corresponds to the size of the strip. Trim the left side and cut along the right side to make your first wedge.


4. Then flip the ruler over so the small edge is at the top. Line the left edge of the ruler with the left edge of the strip and cut along the right side of the ruler.


5. To figure out how many pieces to cut divide 360 by the degree of the ruler. In this case
360 ÷ 22.5 = 16. So you will need to cut 16 pieces or 8 sets of wedges. This formula applies to any wedge you are using.

You will now have 16 cut pieces like this. 

6. Once you have all your wedge pieces cut you will be sewing them to make a point at the top. Here's how:

Fold the wedge in half like so.


7. Then sew using a quarter inch seam along the larger straight line


 8. Then turn the piece right side out to form a point. You can use a stiletto or other pointy object to push the point out. Here's what you will have now


9. Then sew the pieces together. Start at the part closest part to the point and sew using a quarter inch seam to the bottom. Sew them in 2's, making sure the same fabric is always on the top.

10. Continue sewing pieces together, pressing the seams open as you go till you have a full circle (made with 16 wedges).


11. Now it's time to put it all together. You will need the 3" circle die, some double sided web interfacing (I use Steam-a-Seam). Following the directions affix the Steam-a-Seam to the back of the piece of fabric you will be making your circle with. In this case the red fabric.

12. Using your Accuquilt cut a 3" circle out. Also cut a 5" circle out of the Steam-a-Seam alone.

13. Affix the 5" circle to the back of the dresden fan. Then take the paper backing off press the dresden fan onto your background fabric.

14. Peel the paper off the back of the 3" red circle and affix it to the center of the fan.

15. Cut the border fabric into 2 - 1.5" x 8" and 2 - 1.5" x 10" rectangles.

16. Sew the 8" strips to the top and bottom sides of the background fabric and the 10" strips to the sides of the background.

17. Make a quilt sandwich with the backing face down, the batting and the top face up. Pin to keep it together.

18. Using a blanket stitch on your machine sew around the circle to finish the edges. Or you can hand sew a blanket stitch if you prefer.

19. Quilt and bind. I quilted in the ditch between the background and the border until I got to the corners. I marked 1" in from each side and used painters tape to show the line to sew on. This gave it a slightly framed look.


There you go a Dresden Love Hot Pad.

I hope you like this tutorial. Be sure to check out all the other blog hop stops in the Go! Ahead and Show Some Love Blog Hop.

If you are looking for the Accuquilt cutting system and dies they can be found here.

Till Next Time

Monday, January 23, 2012

It's V-Week!

Welcome to Valentines Week here at Craizee Corners! I thought I would live up to my name and really get 'Craizee' this week. I have some valentines projects to show you and in plenty of time to get your Valentine projects done.

And what would a special week be without a special way to win some wonderful V-Day fabric of your own? Fat Quarter Shop has graciously given me a FQ set of Darling Heart Garden to give away!


Isn't this fabric yummy? But this is not the only V-Day fabric that Fat Quarter Shop has, there's several other lines so be sure to check it out.

Today's V-Week project is a mug rug. I love mug rugs and I am in several swaps so this one will be going to someone special.


Love Braids

You will need
1 - 3 1/2" square white
2 - 2" x 3 1/2" rectangles each of dark pink, white, light pink and red. (Piece A)
4 - 2" squares of red
2 - 2" x 14" of red

1. Sew a red 2" square to 1 dark pink 2" x 3 1/2" rectangles (piece A). Press towards the dark pink. Repeat with 1 white, light pink and red. These will be called piece B.


Note - All seams are pressed away from the 3 1/2" square from now on. I finger pressed everything until the end. 

2. Sew a dark pink piece A to one side of the White 3 1/2" square.


3. Sew the dark pink piece B, that you just made, to the adjoining side of the square. 


4. Add the white piece A, starting at the red square point. Sew it to the same side as the dark pink piece A.   


5. Add the White piece B the same way as in step 3.


6. Continue adding the other 2 sets of pieces until all 4 are added.


7. Press the mug rug now. Here's a pic of what the back should look like.


8. Now it's time to trim the mug rug. Line up the ruler 1/4" away from where the 2 pieces meet, which should be where the inside point is (where the seam ripper is pointing. Do this on both sides.


9. Sew a 2" x 14" red rectangle onto each long side. Start sewing with a 1" overhang so you have room to trim. Press


10. Trim the excess off of all diagonal corners. Use the corner of the square as a guide to make sure the angle is correct. Line up a line on the ruler with the bottom straight edge of the mug rug and line the right side edge of the ruler with the right side of the square. Trim all 4 pieces this way.


11. Quilt and bind as normal.

Easy right?

Now for the giveaway!

To win the FQ Bundle of Darling Heart Garden you must be a follower, but you do not get an entry for that, it's just a pre-requisite.

1. Go to the Fat Quarter Shop Valentines page and tell me which FQ set you like the best.

2. Tell me your favorite valentines memory.

There you go 2 ways to enter!

Entries will be accepted until Friday January 27th at 11:59 pm. Mr. Random will pick a winner on Saturday morning once my coffee has kicked in.

If you would like to tweet, facebook or blog about this I'd love it too. Spread the word...the more the merrier. Although I would love it if you helped me spread the word, you do not get an entry for it. You will get my thanks :)

Come back tomorrow to see another V-Week project.

Valentines Day Showcase and Me!

Love (Two red hearts)At the beginning of February Melissa from Sew Bitter Sweet Designs will be hosting a Valentines Day Showcase. Between Feb 1st and Valentines Day a bunch of bloggers will be sharing patterns and tutorial for different Valentines Day Projects. And guess who kicks the Showcase off? That's right lil ole me! Since I am in full V-Day mode right now I promise to have something awesome to share with you.


Here's a list of all the bloggers Melissa has lined up

February 1st – Sharon from Craizee Corners
February 2nd – Connie from Quilting by the River
February 3rd – Vicki from Sassy Blog
February 6th – Kris from I don’t have a problem, I have a well-rounded fabric stash!
February 7th – Melissa from Sew BitterSweet Designs
February 8th – Debbe from Pieces to Love
February 9th – Lyanna from Purple Panda Quilts
February 10th – Jenna from SewHappyGeek
February 13th – Lisa – future food and craft blogger
February 14th – Michele from
Quilting Gallery

So mark your calendar and be sure to join me on February 1st for a fun V-day tute!

Thursday, January 19, 2012

Little Red House

If you are looking for the Nifty Notions Ruler giveaway click here.

I don't know about you but as soon as I made my first Dresden fan point I knew I had to make a Dresden house.


I have been thinking about it all week and today I had some time to make one.


I used 2 - 10" squares or layer cake pieces.

1. Cut 1 - 10" wedge out of the house fabric.


2. Fold the wedge in half along the length and sew a 1/4" seam along the bottom seam.


3. Flip the part you just sewed right side out to make a point. Use something pointy to make sure the point is crisp and press. Use Best Press or Starch .


4. Trim the house to be 6". Measure from the top point 6" and trim the rest off. I used the Nifty Notions 4" x 14" ruler which was perfect for this project.


5. Turn a 1/4" under towards the back to make a smooth edge on both sides and the bottom. Press. I used some Best Press to make the folds crisp.


6. Trace the shape of the house into some double sided fusible web and then cut the shape out 1/4" in from the line. This will make the web a little smaller than the fabric so it doesn't show. (I used Steam-A-Seam). Follow the manufacturers directions to affix the web to the house and then the house to the background.


7. Now either machine or hand applique the house onto the background. There you go...a little red house!


I am going to add some grass, trees and some flowers to finish this off. I used the blanket stitch on my machine to sew on the house and had fun with some other decorative stitches that my machine has.

Remember to enter the giveaway for 2 Nifty Notions rulers! Click here to find out how.