Today's guest is Jennie from Clover and Violet. Jennie and her Mom Clara have the cutest blog.I first found their site when they were hosting the Embroidery 101 Stitch and Quilt Along. I did a few of the squares with the cutest embroidery patterns and plan on making them into pillows. If you haven't been to their blog yet you should, its among my favs.
Hi there, I'm Jennie from Clover & Violet and I am excited to share my Ruby market tote with all of you today. In addition to blogging, I have a small pattern shop with my mom. Our designs mostly consist of original quilted bag patterns, and so far we've used every line of Bonnie & Camille fabric for a different bag.

But, this post is really about my current project, the Ruby market tote. I'm hosting a Stitch & Quilt Along on my blog, making this bag:

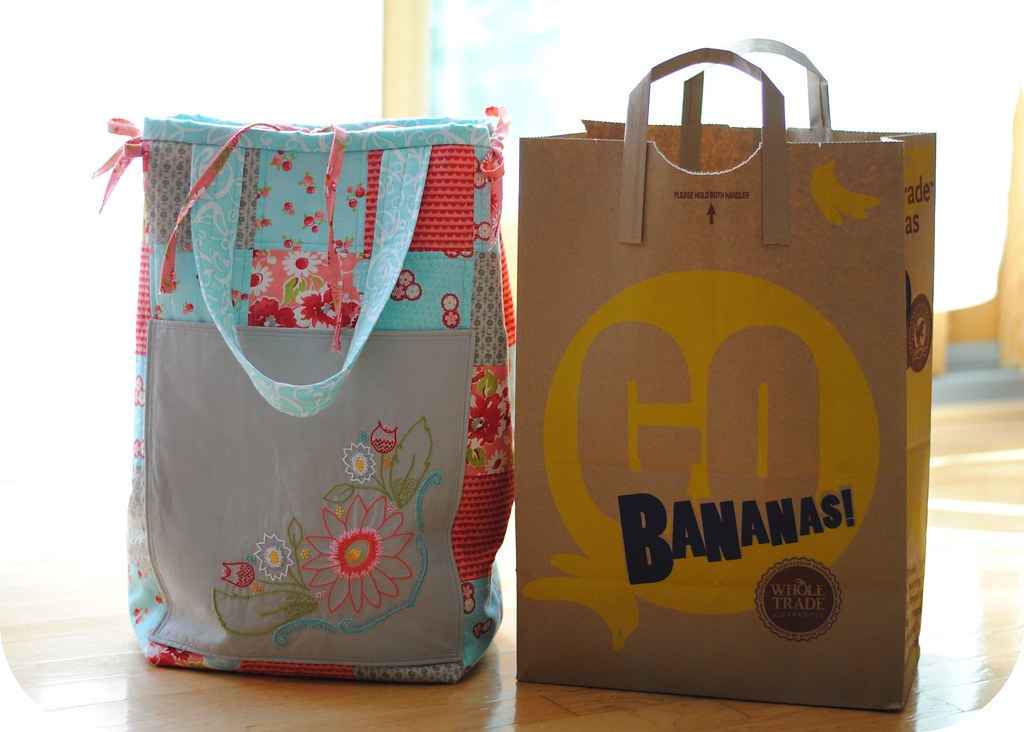
Over the next month we'll be working on embroidering the design on the pocket and constructing the bag {which is not your average bag pattern, but one designed with the quilter in mind!}. My size inspiration was a medium sized paper bag I got at a market. It is a generous size, has room for everything, but isn't overly large {in my opinion}. Since it is a market tote, it seemed like it should be large enough to actually carry a small load of groceries. It measures about 17" tall, 10" wide, 6" deep, and the handles have an 8" drop. Here's a comparison photo:
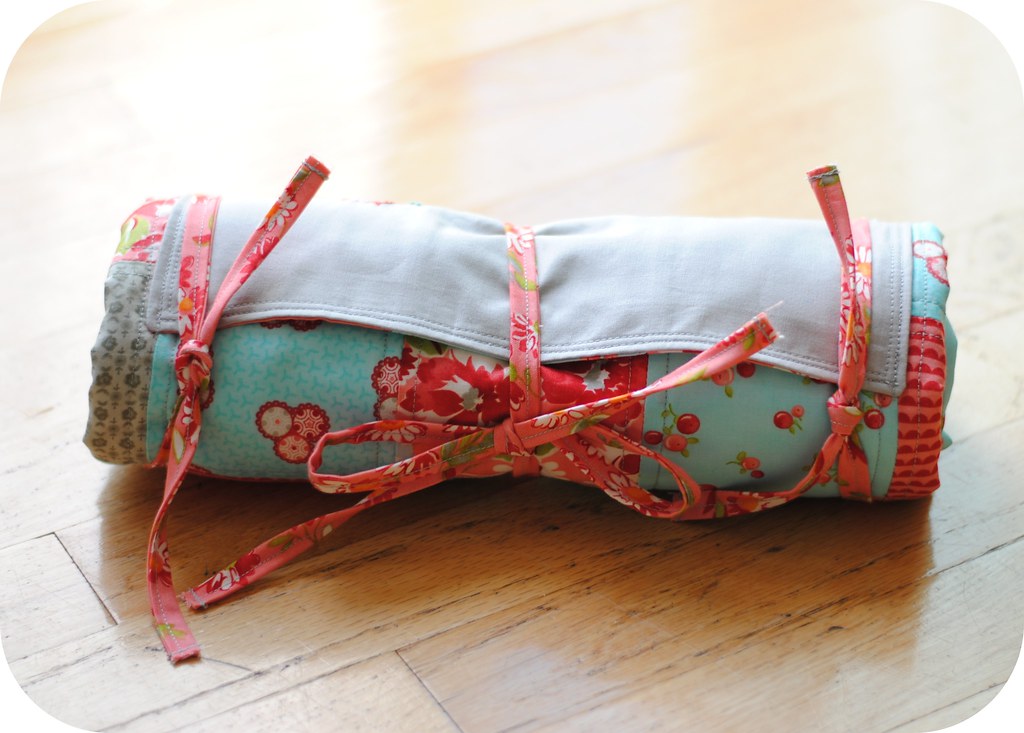
The size ties can be tied tight or loose to adjust the bag to a slightly smaller size when in use {or just for a cute, decorative touch}.
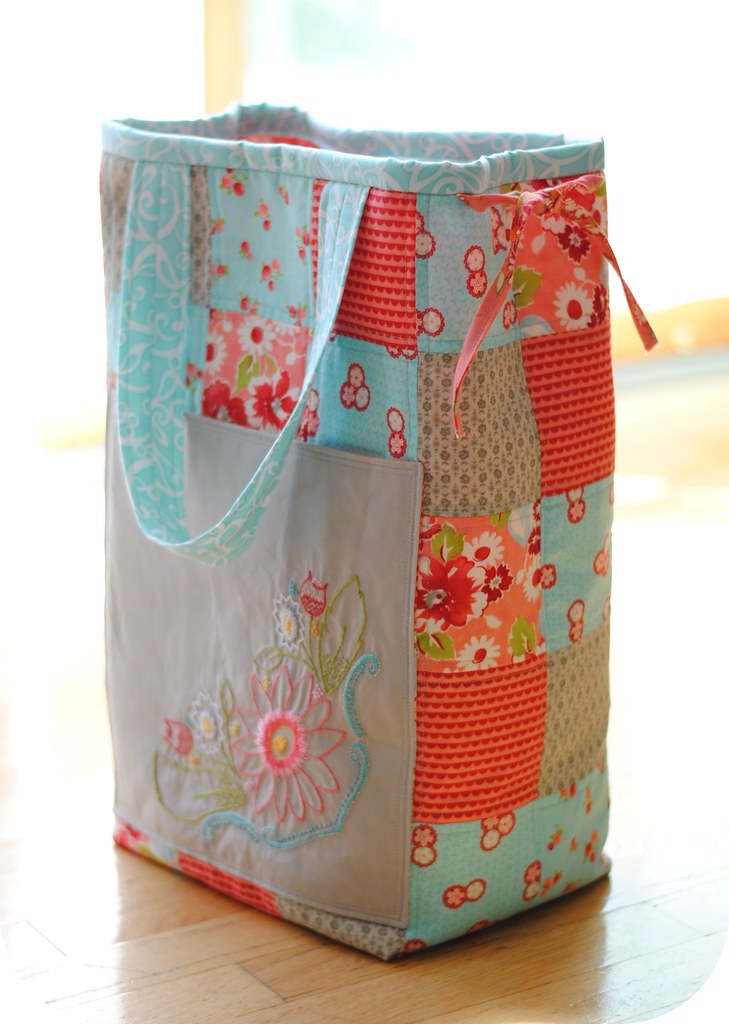
The bag also features two large interior pockets, a small cell phone pocket, a key loop {you're welcome to add a metal key fob if you choose, I just prefer not to}, and a tie in the center. The tie can be used to keep the bag closed when in use or to compact it down when not in use. While it doesn't fold up tiny, it does fold small enough to bring along and not have to carry the entire bag until you're ready.
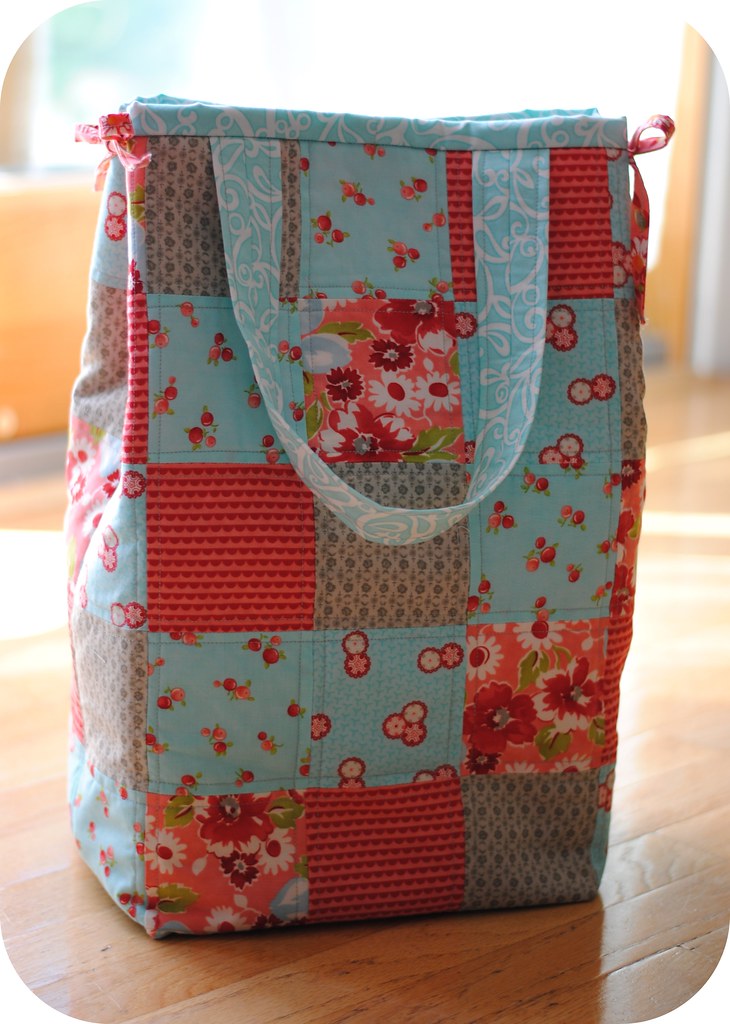
Just in case embroidery is not your thing, here's a picture of the back, and what the entire bag would look like without the front pocket:
One of my favorite things about making bags is that they don't really require a ton of supplies. For this bag you'll need:

6 printed fat quarters, 1 solid fat quarter, and 1 yard for lining. I'm using Ruby by Bonnie & Camille for Moda. We're working with the wonderful ladies at Sew Lux Fabric & Gifts and we've put together a few bundles to help you narrow down the choosing process, if you wish {believe me, it was rough!}.
 |
| Photo by Sew Lux Fabric & Gifts |
Each kit has the six printed fat quarters, plus a fat quarter of Moda Bella Solid in Gray. They're available in Sherbet, Aqua, and Ruby. Please note: the kits do not contain the 1 yard of fabric for lining. This is the opportunity for you to select a favorite print from the Ruby collection, coordinating solid, or even use something from your stash to make each and every bag unique! Another option is to select your own fat quarters from Ruby, other collections, or even shop your stash.
 |
| Photo by Sew Lux Fabric & Gifts |
Since this bag has an embroidery design {my new favorite thing!}, here are the nine thread colors I've carefully selected for this project. Shown above are the Finca Perle Cotton size 8 that coordinate with the Ruby line of fabric. Click here to read my full post on choosing thread types. If you'd like to use these exact threads {which I highly recommend, they're wonderful!} without purchasing the entire ball of thread, sampler kits are available.
 |
| Photo by Sew Lux Fabric & Gifts |
Each kit contains 10 yards of each color, which should be ample thread for completing the embroidery design. Note: a 10" embroidery hoop will work best for the size of the embroidery piece.

In addition to fabric and thread, you'll need 3/4 yard {of 44" wide}of Fusible Fleece {or, you're welcome to substitute another interfacing}. I've chosen to use Fusible Fleece because it will give some shape and texture to the quilting, without making the bag too stiff, so it can still be easily transported when not being used. You'll also need 1/3 yard of a medium to heavy fusible interfacing, this will be for the backing on your embroidery piece. And a piece of sturdy plastic canvas.
If you're interested, there is still plenty of time to join in, and, of course, you don't have to make the bag out of Ruby, but I really couldn't resist it!

Thanks again to Sha for having me share a little of something I love with all of you. Happy sewing, quilting, and stitching!

Isn't that bag wonderful! I plan on making a few. definitely 1 for each of my kids to take goodies home with them when they go home after the holidays. I usually fill a grocery bag up of food for them, so this will be a special treat. Of course I will need to make a few for myself also!
Today is the last day to enter the Ruby Designer Select FQ Kit, a Fat Quarter Shop exclusive. Here's the link for the giveaway. At some point tonight I will be posting the winner.
I hope you enjoyed Bonnie and Camille Week.
The next Designer Select week will be either Fig Tree & Co or Bunny Hill Designs (Puttin' on the Ritz, Lily and Will). Let me know what you would like to see next and if you would be willing to guest blog for these weeks.

First saw this on your blog and really love the touch of embroidery on the bag. Really nice!
ReplyDeleteYAY! Two great blogs at one time...thanks!
ReplyDelete