Showing posts with label quilting. Show all posts

Sunday, February 26, 2012

Twist Along Week 3

Now that you have your 36 patch with borders on and have best pressed or starched it, it's time to start cutting. As I mentioned before, It's a good idea to be able to cut all 49 pieces at the same time. It makes keeping track of your piece placement easier.

The Twister ruler is a square ruler with lines drawn a little wonky. These are the lines you will be lining up on the seams.

Starting at the top left corner, place the ruler along all 3 seam lines. You will only have 3 here because the border is sewn on without any seams. Make sure there are no bumps under the ruler. It's easy to get bumps since the ruler is on 'stilts'. Then cut around all 4 sides of the ruler. Be sure to no go more than a 1/4" past the sides or it will cut into the next piece.


Remove the square from the cutting table and put onto a design wall or table.This is what the 36 patch will look like now.


Here's the fun part. Twist the block clockwise until the block is a straight square.


Repeat for each square, remembering to line up the lines with the seams. On any piece that has a border included there will only be 3 seams to line up with and on all the rest there will be 4. This is what it will look like after 2 squares are cut. 


Keep cutting and adding squares to finish the first row. Notice how you can see the twisted pinwheels forming.


Then start on the 2nd row. This is what it will look like after the first two squares of the second row are cut. You can see the first twisted pinwheel now.


After you have all 49 squares cut out then sew them back together just like you did for the original 36 patch, but you will have 7 rows of 7 this time. Remember not to pull the fabric when sewing it back together because it is cut on the bias and has extra stretch.


Now I just need to give this a quick press. Next week we will be adding an outside border or 2 if you want. I have some of the black Sassy with the little paisley print for the border, but an thinking of doing a turquoise for a first border.

Don't forget to link up your twister quilts on the flickr page.


Tuesday, February 21, 2012

My First adventure with a Long Arm

Yup you read that right...I got over my fear of ruining a quilt when quilting it and with a little help from my friend Angela (and a little push) I was successful!

I decided to stipple this quilt and even though I looked tense and at times oblivious to the outside world (or the 6 others who were in the room at the time) I was as relaxed as I get.


I was petrified that I wouldn't know where to go with the needle and would have a quilt full of points when I changed directions, but that wasn't the case at all. Once I got my rhythm the curves followed. What do you think? Here's 2 close ups of the quilting.


I have to tell you that this was by and far the easiest quilt I ever finished. An hour or 2 to quilt it and then all I had to do was bind it. Here's the finished quilt. It's a Jelly Roll Race Quilt made from a Veranda jelly roll I won from FatQuarterly during a Talkin' Tuesday chat room. If you haven't check out these great sites you really should.


What are you working on this week? Believe it or not I am going back to the Long arm machine (my new favorite thing in the world) and finishing another quilt, just trying to decide which one to do.

Till next time

Tuesday, February 7, 2012

Twist Along Flickr Page

I hope your ready to Twist with me!

I have started a Flickr page so we can all upload our pics.

http://www.flickr.com/groups/1879756@N24/


Thursday, February 2, 2012

Floating Squares Quilt Pattern

Introducing my newest pattern...Floating Squares


71" x 80 

You will need:

4 yards brown fabric
1 ¾ yards orange fabric
1 ¼ yards cream fabric
4 yards backing fabric


Cutting Directions:

All strips are cut WOF (Width of fabric)
14 - 5" strips brown, sub cut 7 strips into 56 - 5" squares
4 - 2 ½" strips brown, sub cut into 56 - 2.5" squares

8 - 3 ½" strips brown for the border
7 - 5" strips cream, sub cut into 56 - 5" squares
7 - 5" strips orange

8 - 1 ½" strips orange for the border
9 - 2 ¼ strips brown for the binding 


Making the 4 patch blocks:
With 7 brown strips and 7 orange strips sew a 5" strip of brown to a 5" strip of orange along the long side.
Press towards the brown.
Sub cut the strips into 5" pieces making each piece 5" x 9 ½".
Repeat with the other 6 strips to make 56 pieces.


Sew the 56 pieces together to make 28 brown and orange 4 patches


Making the Bowtie blocks:

First you need to get your machine ready. Do you have a marked line or a piece of tape along your 1/4" line? Just about everyone I know around here does. What you do is put your needle in the down position and raise your presser foot. Insert a ruler against the needle and lower your presser foot. Line up a line on your ruler perpendicular to a line on your machine table so you know your ruler is straight, ie. the 4" line on the ruler. Then with a fine point sharpie draw a line against the ruler or place a 1/4" piece of tape in the same spot. I didn't have any 1/4" tape when I did this so I used a piece of painters tape that I cut with my rotary cutter to 1/4". And don't worry about the sharpie, you can always remove it with denatured alcohol.


With the 56 cream 5" squares and the 56 brown 2 ½" squares:
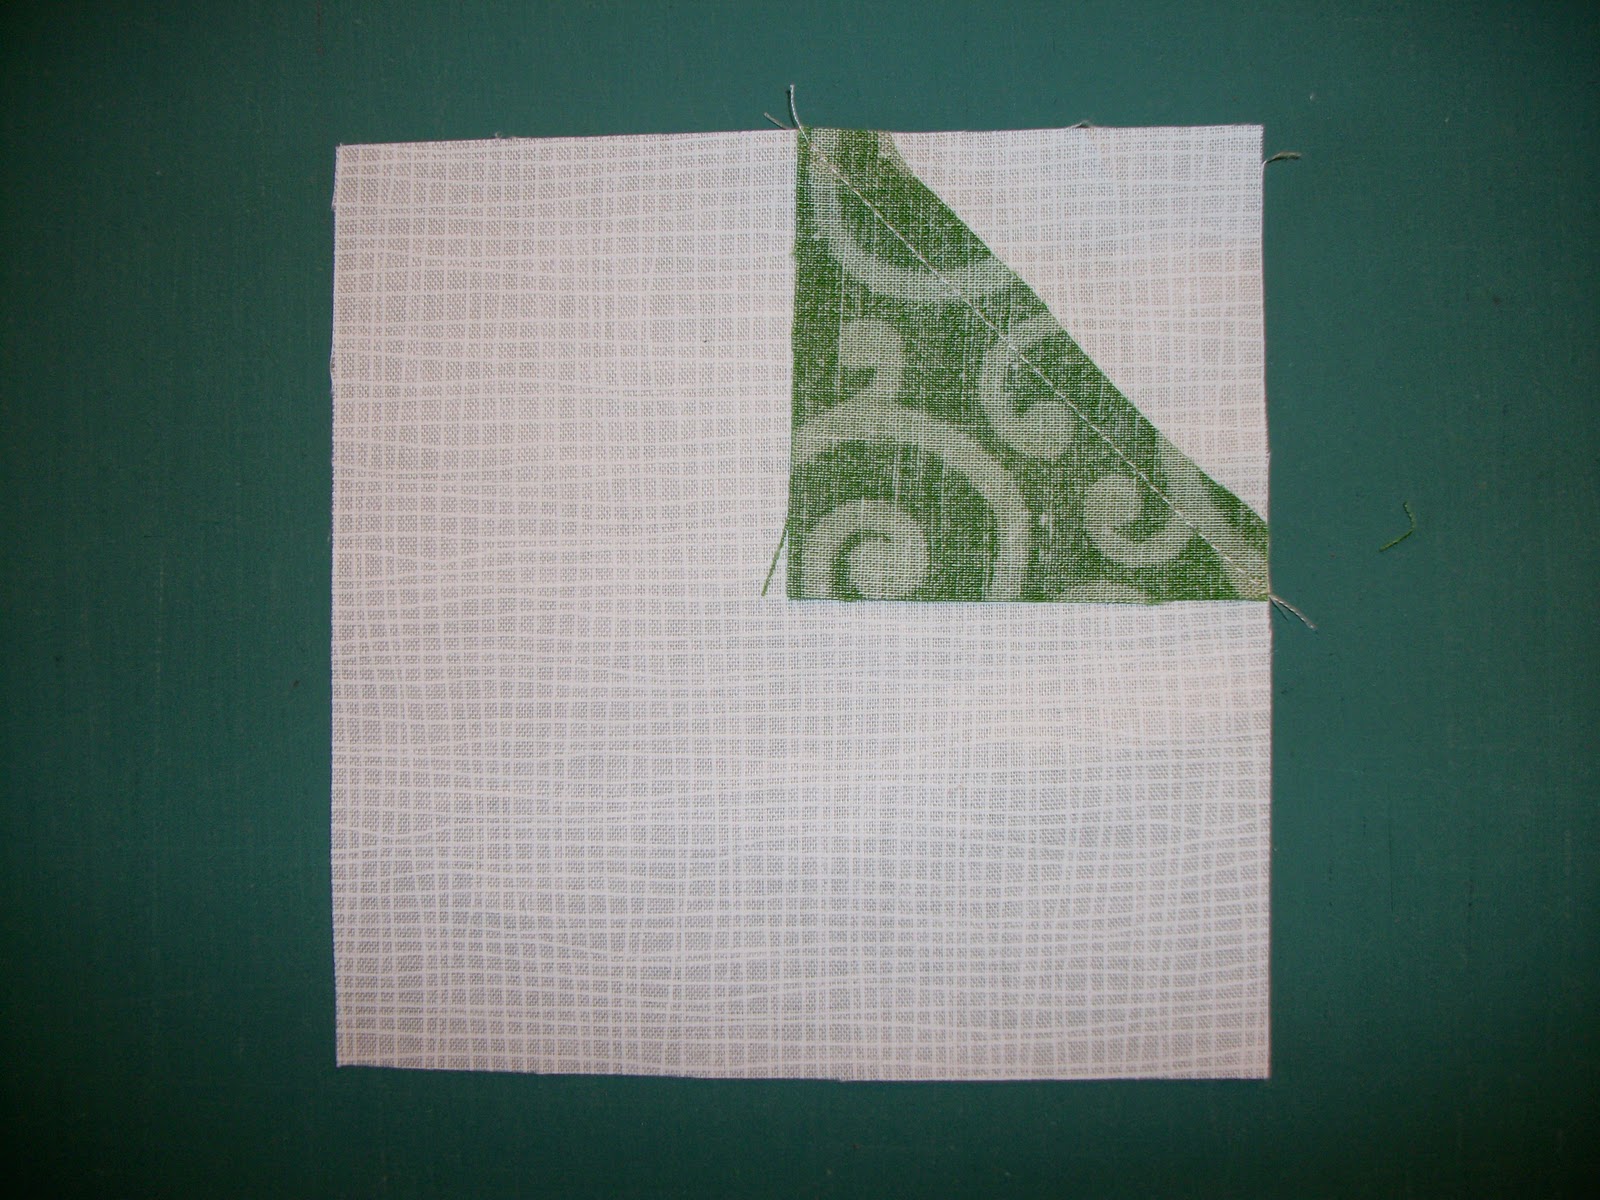
Place the brown 2 ½" squares on the top right corner of a cream 5" square. Make sure they edges are even.


Start sewing at the place where the top left corner of the brown square begins. Keep the bottom right part of the brown square even with the tape line on your machine and continue sewing till you reach the bottom right point of the brown square.


Make 56 of these
Trim the brown triangle piece that is closest to the cream point off. In other words the part you will not see. This will keep the integrity of the square in case your points are a little wonky

  
Press the points over and you will have 56 connector squares


Sew a connector square to a brown 5" square. Be sure they are sewn together like the picture below. Make 56 sets.


Sew 2 sets into a 4 patch to make the bowtie blocks. Make 28 blocks.


Putting it all together:

Using the diagram below sew 4 rows like this, pressing towards the left


and 4 rows like this, pressing towards the right.


Then sew the rows together

 
Adding the borders:

Sew 2 orange 1 ½" strips together along the short side. Make 4 sets of these. Sew the 2 side borders on and then the top and borders on.

Sew 2 brown 3 ½" strips together along the short side. Make 4 sets. Sew the 2 side borders on and then the top and bottom borders on.

Baste. Quilt and Bind as you would like.


I hope you enjoy this pattern!

Monday, December 19, 2011

Quarter Square Triangle Ruler Week

Welcome to the 2nd instalment of the Craizee Corners Specialty Ruler Series sponsored by Brewer Sewing. This month I will be featuring the Nifty Notions Cut For The Cure Quarter Square Triangle Ruler (QST).


This is an essential ruler for quilters. It makes making these tricky triangles so easy and fool proof, plus it works with the half square triangle (HST) ruler to make several different squares.

Here's how to use the Nifty Notions Cut For The Cure QST ruler...

Step 1: Look at your pattern and see what the finished square will be. If the block is 12” finished that means the unfinished block will be 12 ½” It’s the same for these squares. If the finished square will be 3”, simply add ½” to the finished size to get your strip size. In other words, the square will be 3½” which will finish to 3” once sewn into the block.

Step 2: Cut 2 strips of fabric, right sides together, the size of the strips needed.

Step 3: Cut the selvage off of the 2 strips or even them up if the selvage is already cut off.

Step 4: Place the Nifty Notions QST ruler on the fabric so that you can read the logo. Line it up so that the bottom left point is at the bottom left corner of the fabric. Cut the first diagonal on the left side, followed by the diagonal on the right side. Notice the flat notch at the top.


Step 5: Flip the ruler over so that the diagonal line of the ruler is aligned with the diagonal line you just cut. Cut along the right diagonal of the ruler.


Step 6: Continue until you have the correct number of QSTs cut, flipping the ruler for each cut.

Step 7: Start sewing at the flat tab on the top of the QST. This is your ¼” seam line. Put the needle in right at the top left corner and sew down the diagonal using a ¼” seam allowance. Repeat for all QSTs. Do not pull the fabric; just let your machine feed it thru.


Step 8: Press in the direction needed. I find it best to set the seam by pressing the seam with the right sides together. Then flip the top half open and press the seam open. There is no need to trim these at all and there will only be 1 set of dog ears to trim if you want to.

For a PDF copy of this tutorial click here.

 
Come back tomorrow to see this triangle in action in different squares, there's so many different uses for this triangle.

Now for the fun! Brewer is letting me give away 2 sets of rulers.  This month the winners will get a Nifty Notions Cut For The Cure QST ruler and the Nifty Notions Cut For The Cure 22.5 degree Wedge, which will be next months ruler of the month.

Here's how to enter...
Note you must be a follower, but your don't get an entry for that, it's just a pre-requisite.

Tell me what you would use this ruler to make.  

There you go, easy right? It would also be great if you want to Like Brewer Sewing on Facebook.

If you are wondering where you can buy a Nifty Notions Cut For The Cure Ruler check with your Local Quilting Store (these are exclusive and not found in the bog box stores), Kaye Englands store or The Berry Patch. We will have a comprehensive list soon.

This drawing will be open until Thursday, December 22, 2011 at 11:59 p.m.
Mr. Random will pick 2 winners on December 23rd.  


Wednesday, December 14, 2011

Bunny Hill

The first part of the Blog Hop Party Giveaway can be found here and the second part can be found here. Don't miss out on the $50 gift certificate prize from the Fat Quarter Shop.
Today's Designer Select FQ Club Kit is Puttin' On The Ritz from Bunny Hill Designs. I had a chance to visit with Anne at Fall Market and see her wonderful quilts in person. They are wonderful, but even better in person.


This is the second line of Bunny Hill fabric I have. The first line I used was Lily and Will in the aqua and yellow colors. I used this fabric for my first quilt with my first new machine back in March. See here to read about that part of my quilting journey. There's a pic of the quilt on the page above labeled 2011 Quilts finished. It now resides on my oldest son, Bryan's, living room couch. It's just a throw, but its the perfect size for watching TV and I like to think of him cuddled up in it.

I have some friends from around the web that have pictures to show you of their adorable Lily and Will quilts.

First up is Mary from She's a Kwilt Noob who made this baby quilt with a precious owl on it.


 Mary writes
"The pattern is Remember Whooooo Loves you by, Acorn Quilt Co.
I really loved working with Lily and Will because the colors are perfect for a baby quilt, and yet they have a tonal quality that lends themselves so well to most home decor. Also the prints are darling, (I mean, seriously, those little bunnies killed me) but still have a certain sophistication to them. This was especially important to me with this quilt because it was going to a couple who were having their first child at the ripe ages of 44! (Well, he is 44, she is in her early thirties). Needless to say, they both have very "grown up" taste.
Anyway, I hope you like the quilt. The parents did!"
Next is Jennifer's from Gable House Sewing absolutely adorable baby quilt. She made this quilt with all 4 colors of Lily and Will. I love the wording on it...Play, Love, Snuggle, Laugh...all things to do with the baby in the baby blanket. and the little friends residing on the quilt are too cute. (Oh how I look forward to the day when I will have grand babies to make a quilt for with this fabric).


The colors of Lily and Will were beautiful, but I really love the colors in the newest line Puttin' On The Ritz. The gray, white, blue and pink go so perfectly together, none is too muted or too bright, but just right.

I have a quilt planned for it but it might be hard to visualize. I'm going to use the Key to My Heart Pattern again with this fabric. The outsides of the keys will all be gray and the insides will be either pink or blue and the blocks will alternate between pink and blue for the layout. Can you see it? What do you think? And this quilt will go to my first grand baby, even if it's still 10 years away he or she will have a quilt already done (I know I'm Craizee...) 


Here's a sneak peak of Bunny Hill Designs next line Ooh La La. It's available in Feb/March of 2012. Do you see the fabrics with the writing? I can't wait to get my hands on this set either.


Be sure to check out my guests blogs today, you will enjoy them a lot.

Just an FYI, you are not off the hook for a quiz today...Anne had some personal things come up, but you can be sure there will be a Bunny Hill quiz in 2012, I hope you will all be ready for it then.

Don't forget to enter the giveaway for the $50 gift certificate from The Fat Quarter Shop and some Fig Tree & Co patterns. There's 2 ways to enter:
The 1st is here and the 2nd is here.


Tuesday, December 13, 2011

Butterscotch and Roses

The first part of the Blog Hop Party Giveaway can be found here and the second part can be found here. Don't miss out on the $50 gift certificate prize from the Fat Quarter Shop and keep reading because the pot might have just been sweetened a little **hint hint**.

Today's Designer Select Fat Quarter Club Kit is Fig Tree's. It's made with the newest Fig Tree & Co line, Butterscotch and Roses. Now I have to be honest, I personally usually go for the bright colors and wasn't sure how I would like these more muted tones, but once I got the fabric I realized how wrong I was.

The color combinations make for such interesting quilts. The dark brown in this piece reminds me of hot cocoa and the texture added to it gives it such depth and interest.


The yellow in this piece reminds me of honeycombs and the green in the kit is wonderful. Those of you who know me well, know that I have a problems with greens sometimes. I can't tell you how many times my friends have had to talk me into using the green with the line, and they are usually right that it ended up looking great. I'm not sure what it is about green and me, and I know my friends don't either. But I really like this green.


So once I can get back to quilting I plan on working on my first Fig Tree & Co project and I found the perfect pattern. It's called Stems Quilt Pattern by Fig Tree and Co. Isn't it beautiful? To me the bigger pictured quilt looks like apples. I might actually make placemats, they would match my dining room perfectly and the apples are very appropriate since my kitchen is done in apples. And yes, I know my 2012 list of things to make is getting long :) 


Wait till you see what's coming next from Fig Tree...I have a mini charm pack of California Girl that I got at Fall Market and from what I can see in the 2 1/2" squares it looks wonderful. The colors are a bit brighter, I especially love the dark blues and yellows. Here's a sneak peak.


I already know what quilt I will be making with it when I get my hands on it, but you will have to wait and see.

Speaking on things to make, my friend Katy who blogs at Monkey Do sent me this adorable pic to show you of some dolls she made with Fig Tree fabric. Are these not the most adorable things you have ever seen? I just hope when I am a grown up sewist that I can make such beautiful things.


Here's a  marvelous quilt that Tammy Blackburn who blogs at Karamat Designs made. It's made with another Fig Tree & Co line called Fresh Cottons out of a Honey Bun. At one of the LQSs here they call this a wrapping paper quilt. I haven't tried one yet, but this is so inspirational that I might have to someday.


And here's a special treat for you... Joanna from Fig Tree & Co is sending me some patterns to giveaway. This will just sweeten the prize package a bit...not only will the winner get a $50 gift certificate from The Fat Quarter Shop, but they will also get the Fig Tree Patterns!

I hope that you have entered already. There's 2 way's to enter:
The first one is here and the second is here.

Thanks to Tammy and Katy for sharing their Fig Tree & Co projects! Please be sure to check out their blogs and tell them Sha sent you :)

Come back tomorrow for Bunny Hills Designer Select FQ Kit.