Do you remember when I kicked off the Valentines Day Showcase at the beginning of the month? Well it's now time to vote for your favorite projects in the Valentine Showcase After Party.
I have 2 entries in the contest
Love Braids Tablerunner
and a Valentine Goodie Bag
I would love your vote. Click here to go to the voting page. My entries are numbers 9 and 32.
Voting closes tomorrow so please hop on over to the Valentine Showcase page and vote :)
Showing posts with label Valentines Day. Show all posts
Wednesday, February 22, 2012
Valentine Voting
Labels:
Craizee Corners Original,
sewing,
Tablerunner,
Valentines Day,
Valentines Showcase,
zipper bag
Friday, February 17, 2012
Go! Ahead & Show Some Love
The project I made for this blog hop is my Dresden Love hot pad. It's kinda big for a mug rug, but kinda small for a table topper, but is the perfect size for a hot pad.
This is a simple dresden fan using a 22.5 degree ruler. For those of you that are new to my blog, I do a monthly series on Nifty Notions rulers and the ruler of the month in January was the 22.5 degree wedge. Check out all the ruler tutorials I have done for you here.
You will need
1 - 2.5" x WOF red fabric
1 - 2.5" x WOF pink fabric
1 - 5" square red fabric
1 - 8" square white fabric for background
Steam-a-Seam
1 - 1.5" x WOF pink fabric for border
2 - 2.25" x WOF red for binding
1 - 12" square red fabric for backing
1 - 12" square batting
To make this hot pad you will first need to figure out what size fan pieces to cut.
1. Decide on the size of the fan/plate you want. For this project I wanted the fan to measure 7" across the diameter. For those of you who failed HS geometry the diameter is the size of the line drawn thru the center of a circle.
2. Once you know how big of a fan/plate you want you can figure out what size pieces you will need. It's a pretty easy formula:
Take the diameter and subtract 2 and then divide by 2. So if you want a 7" plate/fan it works this way... 7 - 2 = 5/2 = 2.5. So the strip you cut your wedges from need to be 2.5".
3. Now that we know what size strips to use it's time to cut the strips. If you are using 2 different fabrics for the plate/fan cut your strips the desired size and then lay them out one on top of the other with right sides together. Place the ruler on the strip with the Logo face up (so you can read it). Line up the top edge with the line that corresponds to the size of the strip. Trim the left side and cut along the right side to make your first wedge.
4. Then flip the ruler over so the small edge is at the top. Line the left edge of the ruler with the left edge of the strip and cut along the right side of the ruler.
5. To figure out how many pieces to cut divide 360 by the degree of the ruler. In this case
360 ÷ 22.5 = 16. So you will need to cut 16 pieces or 8 sets of wedges. This formula applies to any wedge you are using.
You will now have 16 cut pieces like this.
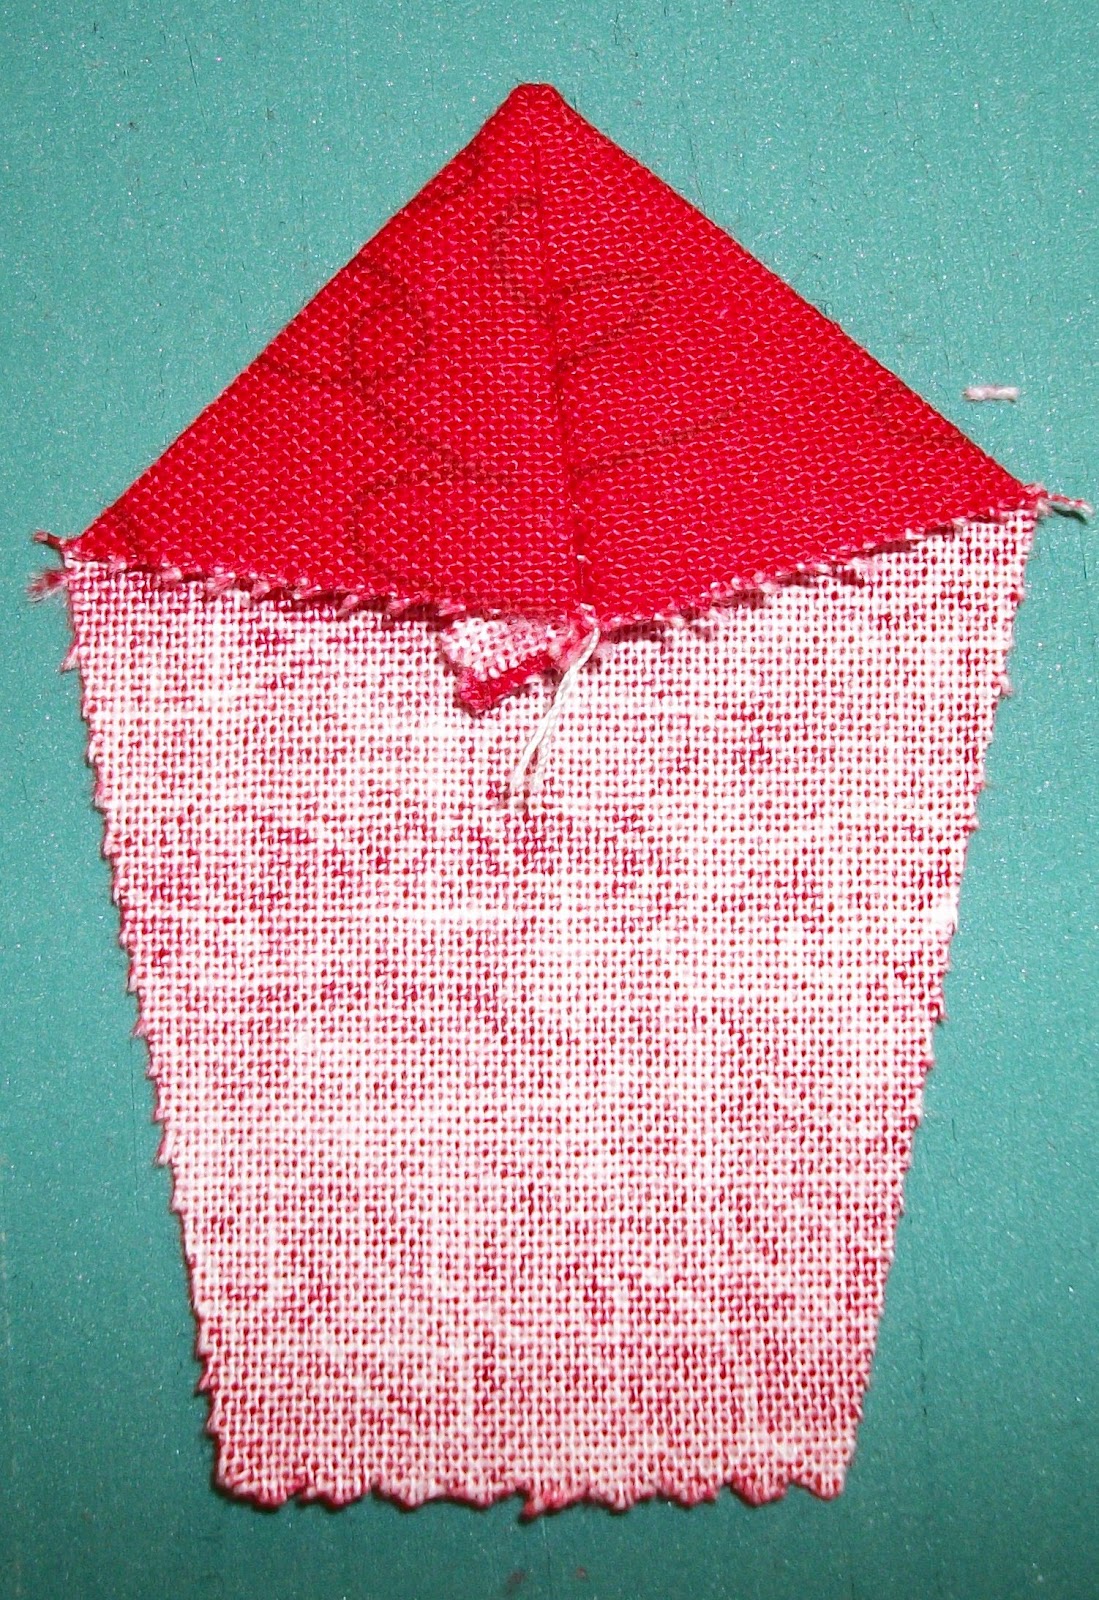
6. Once you have all your wedge pieces cut you will be sewing them to make a point at the top. Here's how:
Fold the wedge in half like so.
7. Then sew using a quarter inch seam along the larger straight line
9. Then sew the pieces together. Start at the part closest part to the point and sew using a quarter inch seam to the bottom. Sew them in 2's, making sure the same fabric is always on the top.
10. Continue sewing pieces together, pressing the seams open as you go till you have a full circle (made with 16 wedges).
11. Now it's time to put it all together. You will need the 3" circle die, some double sided web interfacing (I use Steam-a-Seam). Following the directions affix the Steam-a-Seam to the back of the piece of fabric you will be making your circle with. In this case the red fabric.
12. Using your Accuquilt cut a 3" circle out. Also cut a 5" circle out of the Steam-a-Seam alone.
13. Affix the 5" circle to the back of the dresden fan. Then take the paper backing off press the dresden fan onto your background fabric.
14. Peel the paper off the back of the 3" red circle and affix it to the center of the fan.
15. Cut the border fabric into 2 - 1.5" x 8" and 2 - 1.5" x 10" rectangles.
16. Sew the 8" strips to the top and bottom sides of the background fabric and the 10" strips to the sides of the background.
17. Make a quilt sandwich with the backing face down, the batting and the top face up. Pin to keep it together.
18. Using a blanket stitch on your machine sew around the circle to finish the edges. Or you can hand sew a blanket stitch if you prefer.
19. Quilt and bind. I quilted in the ditch between the background and the border until I got to the corners. I marked 1" in from each side and used painters tape to show the line to sew on. This gave it a slightly framed look.
There you go a Dresden Love Hot Pad.
I hope you like this tutorial. Be sure to check out all the other blog hop stops in the Go! Ahead and Show Some Love Blog Hop.
If you are looking for the Accuquilt cutting system and dies they can be found here.
Till Next Time
Saturday, January 28, 2012
V-Week Winner!
I hope you all enjoyed V-Week here at Craizee Corners, I know I had fun working with all this happy fabric!
I enjoyed hearing about all your Valentine memories, we have some true romantics among us :)
The winner of the Darling Heart Garden FQ bundle is
Here are your random numbers:
Gwen!
She said "Favorite Valentine's memory.... I think that would be making Valentine decorated sugar cookies with my girls when they were young and still at home... They've all grown up and moved away now... well, I *do* still have *one* at home, but she's in college now... Thank you for the giveaway! :-)"
Congrats Gwen! I have emailed you :)
As always a BIG thank you to The Fat Quarter Shop for their sponsorship and for their great service and fabrics!!!
I enjoyed hearing about all your Valentine memories, we have some true romantics among us :)
The winner of the Darling Heart Garden FQ bundle is
Here are your random numbers:
2Timestamp: 2012-01-28 15:39:05 UTC
Gwen!
She said "Favorite Valentine's memory.... I think that would be making Valentine decorated sugar cookies with my girls when they were young and still at home... They've all grown up and moved away now... well, I *do* still have *one* at home, but she's in college now... Thank you for the giveaway! :-)"
Congrats Gwen! I have emailed you :)
As always a BIG thank you to The Fat Quarter Shop for their sponsorship and for their great service and fabrics!!!
Labels:
Always and Forever,
Darling Heart Garden,
fat quarter shop,
Valentines Day,
Valentines Week,
winners
Friday, January 27, 2012
Yesterday I was a Basket Case
If you are looking for the Darling Heart FQ bundle giveaway click here.
I admit it, yesterday I was a basket case! Not the Craizee kind, although I am that from time to time :). But I took a fabric basket class and yes at times it did drive me Craizee.
I love the classes at The Berry Patch in Fort Worth and take them often. They have just about every type of class having to do with fabric I can think of. From quilting techniques to smocking and from sewing cute little things to embroidery.
In yesterdays class we made an adorable fabric basket. We used the Biscuit Basket pattern by Aunties Two. And since I was in full out V-Day mode I used some of the leftover jelly roll strips from Always & Forever. I was a lot of fun to make, and I always enjoy the classes at The Berry Patch. I always meet new people and see old friends when I go there. If you live in North Texas its definitely worth the drive to go there.
I hope you enjoyed V-Week here on Craizee Corners. I'd love to know if you make any of these projects.
Don't forget to enter the giveaway for a FQ bundle of Darling Heart Garden from The Fat Quarter Shop. the giveaway ends tonight at 11:59 PM. If you missed it here's the link again. http://craizeecorner.blogspot.com/2012/01/its-v-week.html
Labels:
Always and Forever,
Darling Heart Garden,
fat quarter shop,
giveaway,
sewing,
The Berry Patch,
Valentines Day,
Valentines Week
Thursday, January 26, 2012
I'm a Snake Charmer Now
If you are looking for the Darling Heart FQ bundle giveaway click here.
I admit it...I am a new snake charmer :)
No I don't mean real snakes (just the fact that I can type that word is a big step for me) but I did charm some charm squares into a cute quilt top.
I used the Snake Charmer pattern by Little Louise Designs. The great thing about this pattern is that its available as a PDF from The Fat Quarter Shop! This is my favorite way to purchase patterns. I can save them to IBooks on my Ipad and have it ready whenever I need it.
Instead of a charm pack, I used 7 FQ's from my Darling Heart Garden FQ bundle and made it a little wider and longer. The pattern is so easy that adding to the quilt is easy. There's no real quilt math to do.
And it uses one of my favorite techniques, connectors. If you missed my connector tutorial you can find it here.
You might have noticed that it's not all the way done yet, there's 2 reasons for that (aka my excuses):
1. I have been slaving away trying to finish my son Tyler's quilt before he goes back to school. I'm very sad to say that I did not accomplish that goal, but I'm very close. All I have left to do is the binding. It's a new Original Craizee Corner pattern so I can't share it until I get it all finished and written up. But Tyler loves it and I hope you will too.
2. I decided on a single fabric border and didn't order it until Sunday. Here's what I am using for the border.
This fabric is from the other colorway in the Heart Garden line called Beloved Heart Garden. I want the border to pull any red out of the snakes to make it pop more.
But I do plan on finishing this quilt this weekend. I am going to send it to my Mom for Valentines Day.
I also want to share an email I got from a follower yesterday. Alyce wrote me:
Awww, so pretty!!
I just wanted to share my creation from last night inspired by your mug rug yesterday!
http://justsewblossom.blogspot.com/2012/01/valentines-mug-rug-candy-love-hearts.html
I was so excited to learn that Alyce used Monday's tutorial to make her own mug rug. She modified it a bit, which I think is awesome and something I do often. They say imitation is the sincerest form of flattery, well this just about knocked my socks off! As a blogger you never know if anyone's really reading the blog or if you are reaching anyone. This totally made my day, along with the other great comments y'all left this week. If you make any of these projects I'd love to hear and see them too :)
Here's my question for today, what would you make if you won this awesome FQ bundle of Darling Heart Garden from the Fat Quarter Shop?
Come back tomorrow for another V-Week project. I have to tell you a secret...It's not done yet. I am taking a class tomorrow and that will be the last project for the week.
Labels:
Connectors,
Darling Heart Garden,
fat quarter shop,
PDF Pattern,
Valentines Day,
Valentines Showcase,
Valentines Week
Wednesday, January 25, 2012
Valentine Table Runner & Where I'll Be
If you are looking for the Darling Heart Garden FQ bundle giveaway click here.
Do you cook for your someone special on Valentines day? I do. I plan the menu for days and make a big deal of it. We eat at the grown ups table with real plates and silverware and everything :)
I don't know how this happened, but with all the table runners I have made I've never made a V-Day one. Well that has changed. I now have this table runner to use every year!
It's made the same way as the Mug Rug from Monday.
I can't give you the tutorial just yet, that has to wait till February 1st when I kick off the Valentines Day Showcase at Sew Bitter Sweet Designs.
Another guest blog post I have coming up is on February 8th. I'll be sharing another tutorial for a fun Valentines project at Sew Sweetness' Blog.
And my Valentines projects will end with a Red/White project as part of the Quilters With Modern Tools blog hop. If you are not familiar with this group head on over the Insights From SewCalGal blog and check it out.
But if you just can't wait for the tutorial here's a hint...
The center is 8.5" and the strips are from a jelly roll.
I hope you are enjoying this series, I know it makes me happy to work on these projects with all this great fabric filled with hearts and stuff.
Tuesday, January 24, 2012
Valentine Goody Bag
If you are looking for the giveaway click here.
Have you joined any swaps this year? I joined a few and one of them is a bag swap. Since I am in heart mode I decided to make my swapee a heart themed bag.
One of the Valentine fabric lines that The Fat Quarter Shop has is Smitten by Barb Tourtillotte. I just love the way she mixed red, pink and aqua with a fun theme.
When I saw this line I immediately knew what I wanted to make with it.
This bag is so easy to make, you don't even need a zipper foot.
You will need to make an 11" x 12" front and the same size back. Be creative anything works, as long as it measures 11" x 12"
You will also need
1 - 14" zipper
2 pieces of batting cut 12" x 13"
2 pieces of fabric for the inside of the bag cut 12" x 13"
1 - 1 1/2" x 8" piece of fabric that matches the zipper
Make a quilt sandwich with the inside fabric wrong side up, the batting and the front of the bag facing wrong side down (just like for a regular quilt). Repeat with the back. Pin around the edges and quilt.
Trim the front to 10" x 11". Then place the front on top of the back and trim the same size. If you have side seams make sure they are trimmed the same distance from the top and bottom so when you sew the bag together they match.
Preparing the zipper
Take the 1 ½” x 8” piece that matches the color of the zipper and press it in half width wise. Then open it up and press the sides to the center. This will be a double folded piece of bias tape. Cut into 2 – 4” pieces.
Cut the zipper 1" less than the top edge of the front panel. Make sure the zipper pull is inside before you cut.
Repeat to finish the other side of the zipper. Here's a pic of a zipper from another project (sorry I forgot this pic)
Adding the zipper:
Note – you do not need a zipper foot for this but I do recommend you use your all purpose foot and not your ¼” foot. You will be doing a zig zag stitch and the ¼” foot might not be able to do a zig zag stitch.
Lay the front of the bag outside piece up on your surface. Put the zipper with the pull side down along the top edge of the front of your bag. Make sure the zipper is centered along the top (about ½” in from the sides).
Sew along the top edge halfway between the zipper teeth and the edge. Backstitch a few stitches at the beginning and end of the seam.
Now it’s time to finish that raw edge. Set your machine to the zig-zag stitch and sew. The left side of the stitch will be on the fabric and the right side will be right past the fabric so the entire raw edge will be covered. When done select the straight stitch again.
Flip the zipper up so it is above the front of the bag and with a straight stitch sew a line right below the zipper, making sure to catch the finished edge of the zipper underneath.
Making the gusset:
Measure 2" from the point and draw a line from side to side. Repeat on the other side of the bag. Sew along the lines, trim 1/4" away and finish the seam with a zig zag stitch.
Here's the bottom and side views.
The great thing about this pattern is that it can be used to make any size zipper bag from a IPod or cell phone case to an IPad case to large accessory bags. The skies the limit.
Come back tomorrow for another V-Week project.
Have you joined any swaps this year? I joined a few and one of them is a bag swap. Since I am in heart mode I decided to make my swapee a heart themed bag.
One of the Valentine fabric lines that The Fat Quarter Shop has is Smitten by Barb Tourtillotte. I just love the way she mixed red, pink and aqua with a fun theme.
When I saw this line I immediately knew what I wanted to make with it.
This bag is so easy to make, you don't even need a zipper foot.
You will need to make an 11" x 12" front and the same size back. Be creative anything works, as long as it measures 11" x 12"
You will also need
1 - 14" zipper
2 pieces of batting cut 12" x 13"
2 pieces of fabric for the inside of the bag cut 12" x 13"
1 - 1 1/2" x 8" piece of fabric that matches the zipper
Make a quilt sandwich with the inside fabric wrong side up, the batting and the front of the bag facing wrong side down (just like for a regular quilt). Repeat with the back. Pin around the edges and quilt.
Trim the front to 10" x 11". Then place the front on top of the back and trim the same size. If you have side seams make sure they are trimmed the same distance from the top and bottom so when you sew the bag together they match.
Preparing the zipper
Take the 1 ½” x 8” piece that matches the color of the zipper and press it in half width wise. Then open it up and press the sides to the center. This will be a double folded piece of bias tape. Cut into 2 – 4” pieces.
Sew across the zipper to keep the 2 pieces in place and then trim close to the seam you just sewed.
Then nestle the cut zipper piece inside the bias tape you just made and sew very close to the left side of the fold. No need for a zipper foot here. Trim the bias tape even with the edges of the zipper.
Cut the zipper 1" less than the top edge of the front panel. Make sure the zipper pull is inside before you cut.
Repeat to finish the other side of the zipper. Here's a pic of a zipper from another project (sorry I forgot this pic)
Adding the zipper:
Note – you do not need a zipper foot for this but I do recommend you use your all purpose foot and not your ¼” foot. You will be doing a zig zag stitch and the ¼” foot might not be able to do a zig zag stitch.
Lay the front of the bag outside piece up on your surface. Put the zipper with the pull side down along the top edge of the front of your bag. Make sure the zipper is centered along the top (about ½” in from the sides).
Sew along the top edge halfway between the zipper teeth and the edge. Backstitch a few stitches at the beginning and end of the seam.
Now it’s time to finish that raw edge. Set your machine to the zig-zag stitch and sew. The left side of the stitch will be on the fabric and the right side will be right past the fabric so the entire raw edge will be covered. When done select the straight stitch again.
Flip the zipper up so it is above the front of the bag and with a straight stitch sew a line right below the zipper, making sure to catch the finished edge of the zipper underneath.
Repeat with the other side of the bag, being sure to attach the zipper to the outside part.
You will then have a piece that looks like this:
Finishing the bag:
Before you go any further make sure the zipper is at least ½” opened.
With the insides of the bag facing out (or right sides together) pin along the sides and bottom of the bag. Make sure to match up any side seams. Sew along the sides and bottom. Backstitch a few stitches at the start and finish. Finish these raw edges with a zig zag stitch just like before.
Fold the bottom right seam up to the right side seam and pin. Make sure the seams are lined up so they match.
Measure 2" from the point and draw a line from side to side. Repeat on the other side of the bag. Sew along the lines, trim 1/4" away and finish the seam with a zig zag stitch.
Turn the bag right side out and there you go!
Here's the bottom and side views.
The great thing about this pattern is that it can be used to make any size zipper bag from a IPod or cell phone case to an IPad case to large accessory bags. The skies the limit.
Come back tomorrow for another V-Week project.
Labels:
fat quarter shop,
giveaway,
sewing,
Valentines Day,
Valentines Week,
zipper bag
Subscribe to:
Posts (Atom)